Showing posts with label Outdoor Education. Show all posts

Tuesday, August 13, 2013

Learning about Camo


After this activity/activities students will have experienced the difference between "predating" non-camouflaged jelly bellies and camouflaged jelly bellies.  As a result, students will clearly understand how camouflage helps creatures that use it, survive predation.  Young students will have an experience they can describe to others when asked for an example of how camouflage helps the animals that use it to demonstrate their understanding.  For older students, they can graph the experience and create a visual representation depicting the difference between camouflaged and un-camouflaged prey.

Preschool:


1.  Find a bunch of toys that you don't mind having outside and in the dirt that blend in with your landscaping as well as two or three toys that will stand out.  While your child is distracted "hide" the toys in plain site.  Have your child count how many toys he sees from the window and point them out to you.

2.  Let your child go outside and find all the toys - don't make this easy, let him/her work to find some of the ones that blend in the best.

3.  Have your child sort the toys into easy - to - find and hard - to - find piles.  Ask your child why he/she thinks some of the toys were harder to find.  Do not critique the answer, just repeat it back to them as though you are making sure you understand his/her answer clearly.

4.  Back inside, discuss what camouflage is, or read a book about it.  There are plenty of non-fiction books about camouflage out there and even more books about animals or ecology with a section about camo within.  for elementary - aged kids I suggest the book, "Where in the Wild".  It is simply a collection of well-taken photos where you try to find the animal within the photo.  There is always a poem to go with the photo that gives you a hint about the type of animal you are looking for and a flap to open if you really get stuck and can't find the hidden creature.  (The ISBN-13 is 978-1-58246-207-3 and the poetry was written by David M. Schwartz and Yael Schy, while the photos were provided by Dwight Kuhn).


A Follow Up for your Preschoolers, OR a great activity for your Elementary or Middle School students:

1.  Find a whole bunch of items all in the same color (beads, buttons paper clippings etc - see photo).  After making sure everything you will be using is clean, place all these items and some contrasting candies (skittles, m&m's, jelly bellies etc. all work) in the bowl.  (Set the same number of candies of similar color aside for the next round)  Hand your child a pair of small tongs, or large tweezers.  Your child must remove the candies one at a time but as fast as he or she can. Time how long it takes for your child to find all the candies in the bowl.  If you are doing this activity in a classroom setting, break the kids into groups and run the "experiment" once for each child.  Have your students record, and share their times in order to make a whole-class graph.  If you are doing this activity with one or two children only, run the experiment 5 or 6 times (perhaps using non-edible items, so they don't get a sugar rush) and graph the separate experiences.

2. Repeat step five, but do the step with the candies of a similar color to your background instead of a contrasting color.  It will likely take longer for your child to find the candies of a similar color.  Point this out to your predator and ask why he/she thinks it took longer one time over the other.  If the answer wasn't already about camouflage or the color blending in to the background in some way during the first activity, it will likely be this time.

3.  With older kids you can do a similar activity about mimicry using two very similarly colored sets of jelly bellies.  For example, have a solid red color and a speckled red color in a bowl together with a bunch of other red items.  Ask your older child to ONLY get the speckled jelly bellies and even with the tweezers, give them 15 seconds to get as many as they can.  They will likely have a hard time distinguishing between the jelly beans when trying to work this quickly and under these circumstances.  Then read a book or website that discusses mimicry and the variety of reasons mimicry is useful in the animal world.

Item of note, these activities are largely analogous to the prey being camouflaged, however predators use camouflage as well.  Mimicry is used as a type of camouflage, but it also has other applications in the animal world as well.  For children in the later Elementary grades you'll want to point this out, for the younger kids, you are simply introducing the idea that animals also play hide and seek and they use clever costumes to help them be successful so these details are less important.


For the purposes of this photo, I've included both the contrasting yellow candies, as well as the more similar red and purple candies. You can even see the yellow ones through the red feathers, however the other two colors are a little tougher to spot except when they are right on top. When your child is trying to hurry, this task becomes even more difficult.

Friday, September 21, 2012

September's Nature Journal

Since fall is the time of the harvest, what better way to do a nature journal entry than to do a search for different "fruits" in the wild. 

 
Botanically speaking, fruits are the swollen ovary that provides an additional covering over the seeds. This would include things like, tomatoes, squash, cucumbers, seed pods, rose hips AND the things we typically think of as fruits such as apples and pears. 


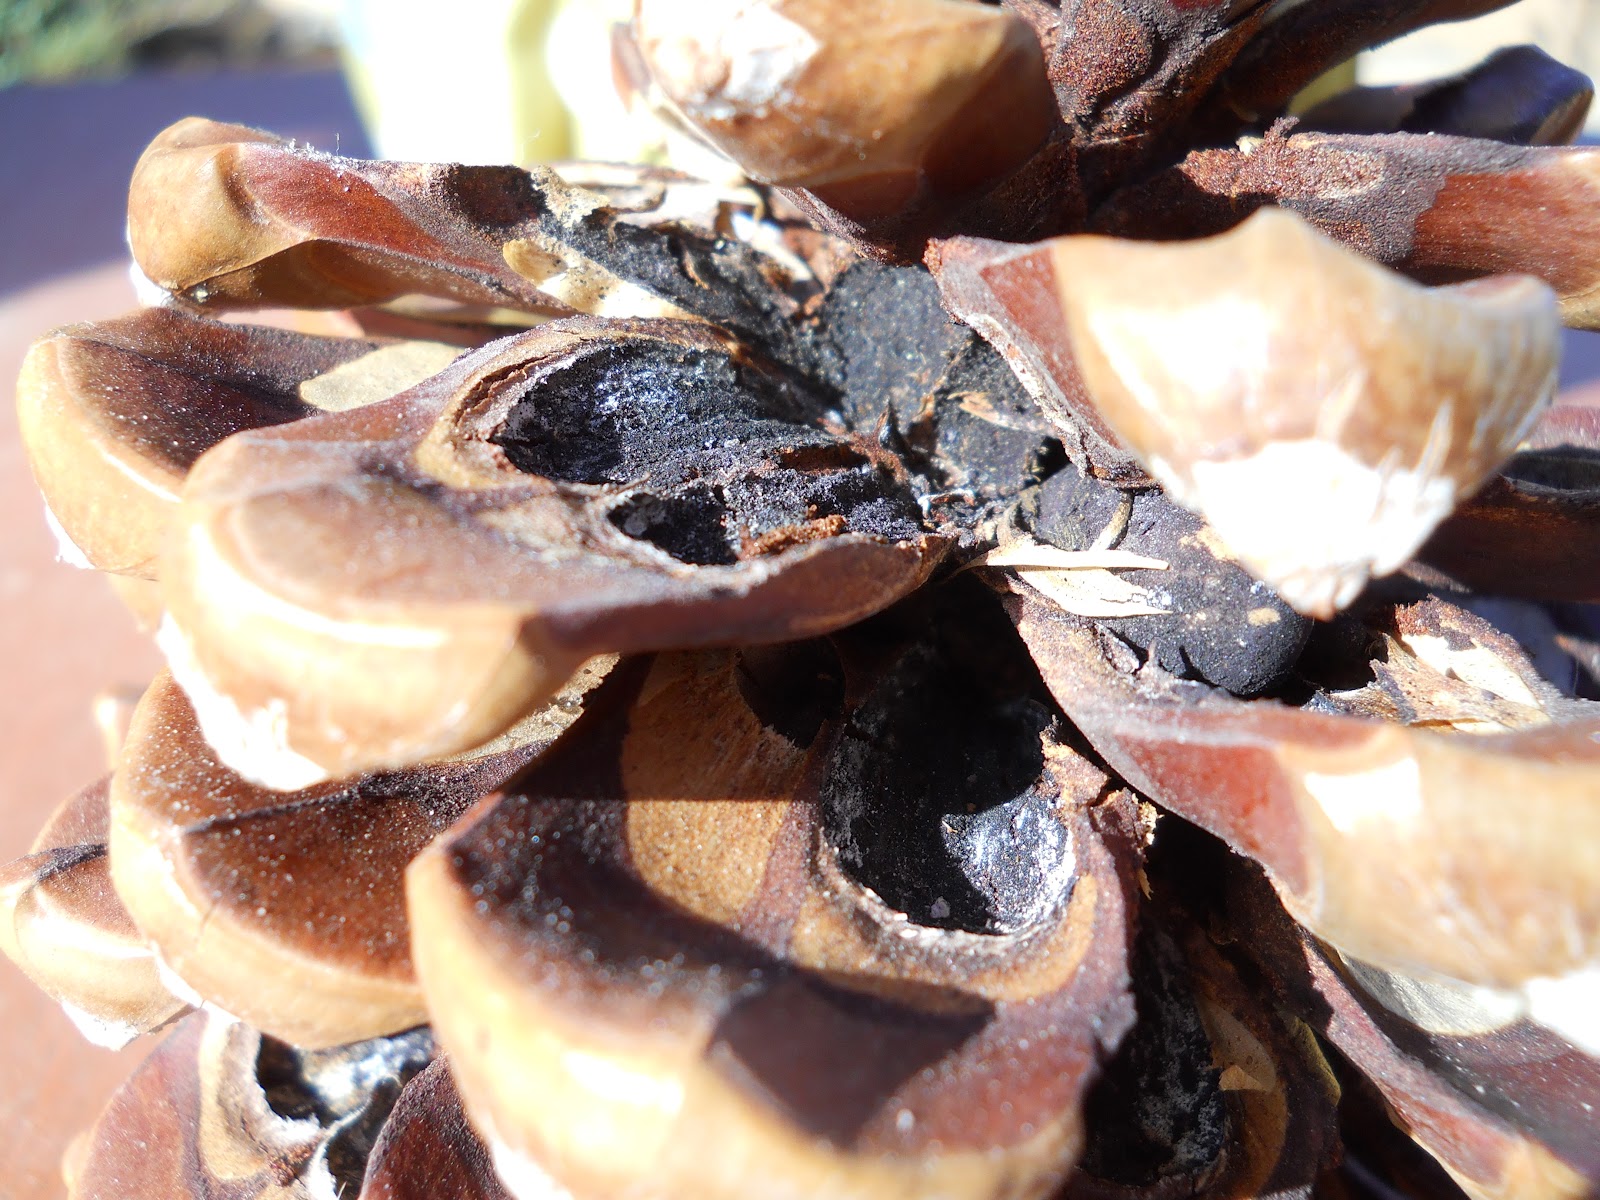
After you've gone on your hunt and found seed containers of all kinds (pine cones aren't officially a fruit but they sure do contain seeds), have fun drawing their outsides, pulling them apart and drawing the seeds and comparing all the different ways seeds can be protected as well as the different colors and shapes of the seeds.


Art and Observation:

The really cool thing about this one is that for older kids they can practice their drawing skills by sketching the seed container from different angles BEFORE opening it up and the also sketching the seeds and interior of the fruit.
This Poster botanical print is from zazzle.com.
Alice's are not nearly this sophisticated (nor mine),
but I have known highschoolers capable of this kind of work.

For your beginners they can practice their shapes by sorting their fruits into fruits with circles, rounded triangles, rectangles and ovals (and whatever other shapes you might find).  Then, they draw the shapes and color in the shapes to match the color of the fruit or seed container they are trying to depict.

Science and Math:

Try to hypothesize about how the seeds travel.  Are they the kind that catches on fur and clothing?  Are they the kind that travel great distances on the wind?  Do birds eat it and then "plant it" the fertilizer they provide when the seed comes back out?  Kids should describe what evidence they see in the seed that makes them believe their hypothesis is correct.  Make a table in which they can actually tape samples of seeds (and/or fruits) when small enough, or draw what they are seeing.  Maybe later you can even do a little research and confirm or rule out the accuracy of their hypotheses.


Writing:

The key to really great fictional writing also often lies in the descriptive passages in the writing.  Emotion is often demonstrated through describing the things that characters keep around them, where they live and in expression rather than stating emotions and feelings of characters directly.  Nature journaling is a GREAT place to practice descriptive writing.  Have your kids choose one "seed container" they'd like to describe.  For your preschoolers, ask for a verbal description of smell, sound, feel (texture), and visual characteristics.  Simply take a dictation.  Your Kindergartners should be able to write 2-3 sentences and older kids can write even more. 

Bonus Follow-Up Possibility:

Collect a few samples of each type of seed you find and bring them in to compare to the seeds of fruits you cut open to eat over the next month.  Kids can practice comparing  and contrasting their "wild seeds" with the more familiar domestic seeds.  You can also take a look at, "A Seed is Sleepy" by Dianna Hutts Aston.  The book is full of beautiful examples of the huge variety of seeds there are in the world and how they spread. 


Wednesday, August 15, 2012

My Shadow


My Shadow
I have a little shadow that goes in and out with me,
and what can be the use of him is more than I can see.
He is very, very like me from the heels up to the head;
and I see him jump before me, when I jump into my bed.

The funniest thing about him is the way he likes to grow-
not at all like proper children, which is always very slow;
For he sometimes shoots up taller like an india-rubber ball,
and he sometimes gets so little that there's none of him at all.

He hasn't got a notion of how children ought to play,
and can only make a fool of me in every sort of way.
He stays so close beside me, he's a coward you can see;
I'd think shame to stick to nursie as that shadow sticks to me.

One morning, very early, before the sun was up,
I rose and found the shining dew on every buttercup;
But my lazy little shadow, like an arrant sleepy-head,
Had stayed at home behind me and was fast asleep in bed.

-Robert Louis Stevenson

During a sunny saturday prepare to take your child outside a couple of times with a tape measure and sidewalk chalk.  Sometime in the morning when the sun is still low have your child stand still as a statue and trace his/her feet tightly and then the perimeter of his/her shadow.  Your child can do the same for you.  Go back out at noon and in a spot near to the first set of chalk-marks, do the same thing again.  Repeat this again at about 3:00 and then again in the evening not long before bed (or sunset whichever is most appropriate)

Things to do with the information - same night or next day:

Measure the lengths of the shadows together and record them in a notebook.  

Create a graph showing the lengths of the shadows on the y axis and the time of day on the x axis.

Discuss the angle of the sun as a possible cause for the changes in your shadows and then test the hypothesis in a dark room using a flashlight and something tall (a shampoo bottle, opaque glass . . .) see if the effect can be recreated.

Bonus Activity:  After it is evident your child understands that a shadow changes depending on the angle of the light hitting it, you might try learning about, and then making your own sundial.

For information regarding how they work and the history of sundials try: http://www.fi.edu/time/Journey/Sundials/aboutsd.htm

Materials:
Long Stick/Stake
Mallet, hammer or other item (large rock) to pound it into the ground.
Sunny Day

Use a long stake and drive it into the ground so that it points at the sun. (in other words, unless it is noon it should not be straight up and down).   The stick should not make much of a shadow right away.  Wait about an hour until a distinct shadow has appeared that is about 6 inches long.  Mark this point according to what time it is and then continue to mark the shadow every hour.  This sundial will now work approximately for a few days.  However, the angle of the sun varies over the course of the year so it will not remain accurate perpetually.  To make a more permanent sundial is much more complex.  If you have an interested kid and would like to try it though, here is a website that lays out the details for building a portable sundial.  This is a teacher to students about sundial making as an assignment.

Definitely for your highschooler.
http://www.fi.edu/time/Journey/Sundials/aboutsd.htm

Tuesday, July 24, 2012

Upside Down Hike

Looking for something different to do this summer?  Go on an upside down hike.  This hike is not taken walking on your hands - though if you can walk on your hands up the hiking trail your young child will LOVE you for it (talk about coolest parent in town!).  Instead, it is an upside-down hike because you turn over rocks and logs and things to see what you can find underneath.  You are turning things along the trail upside down.  Wear a pair of gardening gloves (prevents most scratches and bug bites), sunscreen and a wide-brimmed hat.  I also recommend wearing long pants to avoid brushes on the legs against thorns and toxic plants.  Review your toxic plants before you go and avoid poison ivy in addition to anything else that might cause problems like nettles.  It also might be helpful to have a magnifying glass and field guide about amphibians, insects and reptiles common to your area.  You can find all kinds of things under rocks and logs that will be fun to observe.  Please try to mind your trail manners and return rocks, animals, logs, twigs and any other native object you move back to its original position before moving on further down the trail (this keeps the interesting life you've uncovered, healthy and alive).  Enjoy what you see together.

Art/Science: practice sketching some of what you see along the way together.

Writing Skills: Have your child write a description of a favorite critter that was found along the way.  Or have him/her sit quietly and describe what he or she observes while sitting there.  Suggest using all the senses as starting points for this type of a journal entry.  What does your writer see? smell? feel? etc.

Geography/Map Skills: Make a map of the trail as you walk it, draw in landmarks together.

Reading/Literature (mostly non-fiction): Check out any of the numerous books on insects, lizards, or reptiles you might find under the rocks and logs you overturn.  A perfect one for this activity is Minibeasts Under a Stone.  Read the books together before you go and then make a picture book together of your finds after you've returned.

Science: Learn what makes a bug a bug, and an amphibian an amphibian etc.  There are numerous book resources about this topic and activities to do to really make learning about these critters fun. If you really want to learn more about Creepy Crawlies spend some time with it and make your upside down hike the introduction or the finale - either way its lots of fun.  Here is a link to many internet sources and not surprisingly, the San Diego Zoo also has some info on the matter for kids.

Monday, July 23, 2012

Pretend Mail Delivery

This activity is pretty fun, helps your child practice matching skills and number recognition, helps your child practice large motor skills, and gets your kid/kids outside for a little while doing something fun and different.

Things You Will Need:

  • Some Junk Mail
  • A pretend car or child-sized, scooter, bicycle, tricycle or other "vehicle" for the postman.  If necessary, the vehicle can be your child's own feet, but it is typically more fun in a "vehicle" with a basket, trunk or a satchel for transporting the parcels either attached to the vehicle, or safely worn by the child.
  • Large Sharpie.
  • "Mailboxes" - these can be actual boxes, big sheets of paper, or squares marked out with sidewalk chalk.

What to Consider:

The child will be "delivering" the mail to three or four "addresses" you create.  The idea here is to practice matching in a fun way while also developing familiarity with numerals.  If you have a two year old that is just getting to know and identify single digits, you'll probably want to make your addresses, single digit addresses.  If, on the other hand, you have a four year old that is happily counting to 50 or more, you might want to make things more complex by adding a few more addresses and using numbers with three or more digits (112, 1043, 3260, and 1057) for example.  It is not important that the numbers be sequential or realistic in terms of address proximity.  

What to Prepare:

  1. Using the Sharpie, cross out any real addresses or anything that might become confusing for the child.
  2. In the largest area without text on the envelope or magazine write one of the numbers you have chosen.  Make a few pieces of mail for each address.  You can also use scratch paper or construction paper with a number taped to the envelope to "cover" confusing texts and pictures if you would like.
  3. Create your "homes" or "mailboxes" and make sure each has an address that clearly matches the mail you've made. 

To Do:

Shuffle the Mail, hand over to the postal worker and let the deliveries begin.  Play along, wave to the post person, sign on a clipboard to accept a package delivery, involve the neighbor kids as "other neighbors" to receive mail. . . You get the idea.  

Variations: 

You don't have to use this exercise only to practice math.  It also works wonderfully with colors, shapes and anything else you might like to practice matching - just pretend the concepts to be matched are the address.  You could even do an exercise with Capital Letters on the "homes" and their matching lower case versions on the "mail" to be delivered for pre-reading skills.

Saturday, May 19, 2012

Turn Bubble Time, into Science Time

Once upon a time I "consulted" for the Kindergarten teachers at the school where I was teaching middle school because none of them felt confident with their science knowledge.  So, once a month I did a lesson in the kindergarten.  In September, we blew bubbles to learn about the scientific method, and then again in April or May, we blew bubbles to learn about geometric shapes.

For scientific method, variations to the bubble blower were the key.  We asked, "what is required in a bubble blower to make good bubbles?  We always did three sessions.  In the first session, we studied "bubble blowers" I brought in and discussed which properties they all shared and I demonstrated each blower's bubble blowing abilities.  I had different sizes, shapes, and even things like coat hangers and circles of ribbon tied to a stick.  This was our "research" session.  

For the next class, kids brought in something from home they hypothesized would be a bubble blowing breakthrough.  Kids brought in spatulas, the little tools with which you dip eggs at Easter, one kid even brought in a toilet brush (which his mom reassured me was new and unused) "because bubble wands have those fringes on them" he said.  They had to share their individual hypotheses with the class about, "what made a good bubble blower, good". 

After this first portion, They were broken into four smaller groups and each group was given a giant sheet of paper on which, The teacher's assistant, principle and myself drew pictures representing each of the bubble blowers the kids brought in (we did this as they arrived at school with their blowers).  There were already grid lines drawn ahead of time so it would become a table for recording.  From left to right the columns said,  "blows bubbles",  "blows a bubble or two", "sometimes makes bubbles with difficulty", and "doesn't make bubbles".  The group had to make a hypothesis about each blower by checking the box they thought would be most fitting for each of their blowers.  Then, with a differently colored crayon, they ran their "tests" and marked the results.  All during this, the four of us adults monitored group discussions, used scientific vocabulary as it relates to the scientific method over and over again, celebrated successes with appearances of bubbles and generally had fun being teachers and watching the kids learn while having fun. 

At the end of the session (about 90 minutes total) we spent about twenty minutes discussing our results, drawing conclusions and summarizing the day's activity with an interactive lecture/discussion method.  I always made sure to review the steps of the scientific method we had taken and associated those steps with the actual actions that matched each step.


For the last five minutes or so, I asked the kids if they had any new questions about bubbles that had come up because of their experiment.  The third session was always about one of the questions that arose during the previous session.  Size often came up and was an easy one to experiment with.  I had four sizes of circle bubble blowers, the one shown in the picture here is the smallest.  I always made sure the kids had a table to input their information into.  This introduces them to tables, instills the importance of being in the habit of recording results, and is simple for them to do.  They just mark an x in the "right spot".

At the end of the year, the kindergartners were always excited to hear they would be blowing bubbles with me again.  This time the lesson was about shape and took place after their teacher had introduced the group to three dimensional shapes.  If a circle bubble blower makes a sphere will a triangle make a pyramid?  Will a square make a cube?  You get the idea.


This bubble blowing switch blower, is from the Think Box company and was just something I've picked up in the last few years as part of a kit for something else, but it really isn't required.  I used to use bent coat hangers and they worked just fine (in fact, better than the diamond or heart on this little tool have ever worked).  You only need to be sure the join at the end of the wire is close or tight and flush or flat back to itself.  The switch blower is just easier to store and then carry to different locations with me.


Of course I have the kids track their testing on a chart, (one of which is pictured below) and eventually, they always conclude that the shape of the blower doesn't matter, you will always get a sphere, if the blower works to make bubbles in the first place.


The very last step in the Scientific Method is to communicate your findings.  Unfortunately, this step is often forgotten in science lesson plans that get published or are regularly used in schools.  Without publishing, or sharing findings though, the conclusion a scientist draws can never be replicated by peers and advancements cannot take place.  For kindergartners, communicating their findings meant telling their parents about it, making posters for the walls in the school, or drawing a picture that represented what it was they had done.


Monday, May 14, 2012

Photographic Scavenger Hunts

This is a great activity for any age (the whole family can participate together).  This list of activities and activity variations helps kids practice their observational skills.  These skills are incredibly important to both the artist and the scientist.  If you have an eye for art, you can also make this specifically about the art of photography.  Give your child some tips on framing, lighting, angles etc. as you work together to photograph the items on your scavenger hunt list.  If the hunt is to be a part of a lesson or an assessment of understanding toward the end of a unit, make sure to follow up by completing a "sort" at the end of the activity and discussing with the child why he or she chose the photo subjects he or she chose. 

This activity can also simply be a wonderful way to encourage slowing down and looking at the world around you while you go for a family walk and connect.  Or it can be a great way to foster a little healthy competition if you have multiple teams race for speed against each other while at a park. 

You'll need at least one digital camera you feel comfortable handing over to your child or children, or that you can at least use together.  With disposables out there these days, it shouldn't be too hard to find such an item.  While on a walk or hike together, at a park, botanical garden, zoo or other outdoor type of space you can complete a photographic scavenger hunt. 


Things You Might put on a Scavenger Hunt List:

Each of these items can be combined into a list appropriate for your child's age and the region in which you live, or you can choose one theme on which to focus.  For example, you could create an entire list on just plant life alone.  If you were to do this, you might focus on leaf shapes, bark texture, and seeds and flowers that help identify and distinguish between the most common trees in your area.  But it is also just as much fun to combine ideas from different themes to create variety and interest.  Especially if your goal is simply to have a good time together.

Plant Life: 
Different types of leaves (look for different shapes as well as color in the fall), Different types of "seed containers" (any type of fruit, cone, berry, pod etc. . .  ), or different types of flowers.

Make sure you choose numbers of each item to be found, in such a way that suits  the season.  For example, in early spring there will be more flowers to find and fewer "seed containers". 
Seed Containers
For one variation that will help your young child practice colors, you can specify additional flowers you know they will find in particular colors.  Such as, 1 red flower, 1 pink flower, and 2 different yellow flowers.   Or, if it is fall, 1 yellow leaf, 1 red leaf and 3 brown leaves.

Another variation might simply relate to number of petals on flowers photographed.  "Find one flower with six petals and another with three".  You can even call for multiples if you have a child practicing with the concept of multiples in math.  Interesting piece of trivia: all true flowers come with petals in sets that are multiples of 3, 4 or 5.  A list relating to this might look like this: find 1 flower that has a number of petals that is a multiple of three, 2 flowers that are a multiple of 4, 3 flowers that are a multiple of 5, and 4 flowers that have way too many petals to count.

You can make similar variations with the seed containers where you specify finding 2 different types of cones, two different types of pods and two different types of berries or other "fruit" such as drupes or pitted fruits.  Check out these "seed containers" on top of this dessert tree.

It is easy to directly relate a list of items to find from plant life to any biology objective about plants, or diversity of life.  Especially when you preface the activity or follow the activity with a comparison of what the child finds to what is in his or her curriculum.  There are also lots of  books you might pick up and read on the subject.  You can also do a comparison of living to non-living or plant, to animal etc. If you make sure to focus your list appropriately to fit your goals, a child will retain a lot of information after a hunt like this AND remember that information longer than if many other methods of teaching were used.  If you happen to be traveling through different types of habitats, you can stretch your scavenger hunt over days and miles and make sure to include items specific to each habitat through which you will be traveling.  Just follow up with a comparison activity.  Revisit and sort the photos at the end of the "hunt" or trip while you discuss those photos with one-another.

And yes these photos are from our
own walks and adventures.
Shadows:
This one can be a great way to practice with shapes, or you can just say, "go find 10 completely different but interesting shadows to capture on your camera".  If one of your children is learning his or her shapes, create a list with the goal of shape practice in mind.  You might ask him or her to find a straight line, find a wavy line, find a shadow of something rectangular, something square, something circular, a diamond (or rhombus if you want to use geometric terminology) and something hexagonal (then make sure there are some street signs they'll be able to see along the path).
A Shadow hunt is also a great one if you are trying to educate your child about positive and negative space in art.  For more shadow activities click here.

Outdoor Life:
Of course you can put all kinds of animals on your list, perhaps you include one insect, one arachnid and one bird, as well as one or two more crawling things (such as a worm, centipede or snail).  Just insects alone can provide an entire list for a budding young entomologist.  Insects with wings, insects without, insects with two wings vs. insects with four. . . (you get the idea).

You might also offer up part of a list as, a flying animal, a crawling animal, and a swimming animal.  Obviously if you are at a zoo, you would make these numbers a little higher.  If you will be doing this hunt near the beach, you could easily include seashells in most areas.  Since it is a photographic hunt, even still-occupied shells and other living creatures such as sea stars can still be "collected" in the memory storage on your camera.

The Non-living:
If your child is doing a unit on geology, you might include a few of the rocks with which your child should be familiar that you know are easily found in your region.  If you are being less formal about it, or if you are practicing colors, you might pick three rock colors that are easy to find in your area.  Some places have lots of greys while others have lots of browns or even reds, whites and greens or yellows.  You might also list building materials such as "a structure made with wood, a structure made with brick and a structure made with stone", something that is metal, something that is plastic. . .  you get the idea.  This can even be a scavenger hunt idea for traveling families on the road.  Just be ready to pull over for picture taking.  Add man-made landmarks such as bridges and tunnels as well as famous buildings (they'll need to have viewed a picture of these before hand to find the correct buildings).  For you kid who is highly interested in cars, trucks, tractors, trains etc., center your list around their interest.  Construction tools such as cranes and bulldozers, semi trucks, buses and the like can be part of a list you might make as well.

At A Zoo, Aquarium, or Botanical Garden:
Add a little geography to your scavenger hunt by including the idea that a representative from every continent be included in the hunt.  Zoos almost always include habitat ranges for each animal on display, some botanical gardens will include sign posts that give the location by country or range where the plant can naturally be found, but not all.  You may want to know if this information is available in advance of your trip.

Example of a General List for Your Own Backyard in the Late Spring:

EVERY PICTURE CAN ONLY COUNT AS ONE ITEM:

Three very different shadow
         (look for different shapes or different types of lines)
Something that holds seeds
Three different colors
An interesting pebble
Two different types of insects
Two things that fly
Two things that crawl
Three different types of leaves
         (leaves do not only come from trees, so even if you don't
             have trees, include this one.  A blade of grass is a leaf).
Something that belongs to you (bring that one back and put it away)
A picture that shows four items that are the same
A picture that shows three items that are the same

Themed Photographic Comparison List Ideas (some of these are great for a walk in the city together too):

For these, give your child categories of things to find.  Then, when you get home sort them out on your computer (or get them printed and have your child sort them as you would cards) into their correct categories.  Have your child aim to get a number appropriate for their age for each category.  For example, I might ask a five year old to get photos of five things that are each of the three primary colors, but I might ask a six year old to get six of each or an eight year old to get ten each of items that are of primary colors and ten that are of secondary colors.

Living, was once living (fallen leaves, dead looking plants, logs, seashells etc.) and non-living things
Things that Walk, Crawl, Fly, and Swim.
Things with curvy edges and things with straight edges.
Things that are hard and things that are soft
Colors: Individual colors, primary and secondary colors, tints and shades etc.
Things with stripes and things without (and other similar variations)
If you can do two walks - one during the day and one at dawn or dusk: Nocturnal and Diurnal.
Man made things and Nature's Treasures
Vertebrate and invertebrate (Intermediate)
Monocot and Dicot (Advanced)
Regular shapes and irregular shapes
Opaque, transparent and translucent
Vehicles for transporting people and vehicles for transporting stuff
At the Farmer's Market you might do Fruit vs. Vegetable (careful, this is actually tricky for many adults
                                                too!  Did you know all types of squash are also fruits)?

With any of these scavenger hunts or comparison hunts, if your objective is specifically about learning or reviewing a specific topic or classification, you'll want to make sure to sort and discuss your photos after the hunting part is over.   A child might even make a poster out of their picture sort (I suggest columns).  Then their work can be proudly displayed some where for awhile and he or she (as well as the rest of the family) will continue to get reinforcement about the subject at hand.

Obviously, this is not an exhaustive list, but hopefully it will inspire you and provide a great place to start.  As you can see, depending on what you put on your list and what goals you have, this exercise can work for any age level from three on. 

Friday, May 4, 2012

Learning about Creepy Crawlies

Creepy Crawlies

You'll find that a lot of children's insect books will mix worms, pill bugs, centipedes, milipedes and arachnids (spiders, mites and scorpions) in with the insects.  Although these are not, in fact "bugs" zoologically speaking, they all certainly fall into the "creepy crawly" category for many of us.  Bugs and their "creepy crawly" companions are incredibly important in our own food production, health and waste decomposition.  Kids that feel an appreciation for bugs and who know which ones are dangerous and which are not will be more comfortable and confident during outdoor activities.  They will also be safer because they will know how to act around insects, arachnids and other small creatures found in the garden.  You can help kids feel less "creepy" about these crawlies by simply learning more about them.  Open their worlds and opportunities by taking a closer look at "bugs".

Once you've done a little research and learned a little about what you might find, there are all kinds of craft projects you can do, including this egg carton craft (if you are a little too creeped out to actually go looking for the real thing) but there are also tons of kits and tools available for study of a specific insect in the home, or for catching, studying and releasing bugs right in your own back-yard.  Have a fun "insect hike" or dig through some compost (wear gloves!) and see what critters you can find there.  You can grow an "ant farm", a "worm ranch" and order lady bugs to protect your roses from aphids.  Please be responsible about making sure any insect (or other creepy crawly) you purchase is a local one before releasing it into the wild and have fun!

Books
Summer Birds, shown at right, is a wonderful book that will tell your child a little bit about mideival beliefs about insects including the belief in spontaneous generation while it also teaches kids about metamorphosis.  The illustrations are brilliant and clear.  I highly reccomend this gem.

Almost any of the visual encyclopedias out there can be wonderful non-fiction "reading" for even the very young.  Examples include Insiders Insects and Spiders, Noel Tait; World of Animals 26: Insects 5, Ken Preston; - Mafham, DK Publishings's "Eye Wonder series" Bugs (DK is Wonderful - check more options out at www.dk.com), or The whole "Minibeasts" Series by Smart Apple Media: Minibeasts In the Compost Heap, Minibeasts In the Home, Minibeasts On a Plant, Minibeasts In a Pond, Minibeasts In the Soil, and Minibeasts Under a Stone.

The entire "Backyard Books" series, Are you a ___________ is also cute, well illustrated and fun.  My three year olds LOVED them when I taught preschool.  Fill in the blank with any of the more popularly known "bugs" such as ant, dragonfly or grasshopper and you have a fun take on that insect's life cycle your child/ren and you can enjoy together.  These books are by Judy Allen and Tudor Humphries and I've mentioned Are You a Ladybug and Are you a Butterfly in other posts as well.

For the particularly young, Eric Carle has a number of books about "Creepy Crawlies"  The most popular is the classic Very Hungry Caterpillar.  However he also did one about a click beetle, a Grouchy ladybug, a Very Busy Spider and a Very Quiet Cricket.  If you include creepy crawlies at the seashore there is also A Home for Hermit Crab and probably others.  Lois Ehlert's Waiting for Wings is wonderful with Whimsical, but illustrative pictures, and finally, Leo Lionni's Inch by Inch is a also a fabulous journey all about crawling inch by inch.

National Geographic Kids Science Fair Winners Series: Bug Science by Karen Romano Young and Illustrated by David Goldin includes insects, arachnids, isopods (rolypolies) and worms.  This book contains great ideas for simple experiments kids can do with and about bugs of different kinds. A bug supply may be required for some experiments.  For the sake of experiments and surveys in the book that require keeping and maintaing bugs, the book includes information about how to catch bugs, raise bugs, keep bugs healthy for a period of time, and all things a person needs to know to keep bugs.  The book also includes a handy guide at the end with tips and suggestions about how to present the experiment as a science fair project if your child will be participating in a science fair. 

Online
All I can say about Insect.org is, you won't believe it till you see it!  AMAZING:  http://www.insects.org/

Insect Lore For fun games and activity ideas relating to insects and Earthworms.  http://www.insectlore.com/

Let's Talk about Insects by the University of Illinois Extension is an animated description of insect basics and vocabulary.  http://urbanext.illinois.edu/insects/01.html

Stein's Virtual Insectory has lots of great photos and  a little information to accompany those photos.  http://www.virtualinsectary.com/

US Geological Survey Biological Resources: Use this one with older kids that might like to go on a bug hike.  Identification tools as well as other entomological information regionally segregated hosted by the Northern Prairie Wildlife Research Center.  http://www.npwrc.usgs.gov/resource/taxa_i.htm

The Bug Club is a website (and club with a published magazine and all) for young amateur entomologists. http://www.amentsoc.org/bug-club/

Teacher's Pages:These sites include a variety of links to websites with lesson plans, crafts or bug-related activities including "tasty" insect recipes.   http://www.teachingheart.net/teachinsects.html and http://iitc.tamu.edu/1998and2000/lesson_plans.html.

Movies
Bill Nye the Science Guy - Spiders:  As usual, Bill Nye's movie offers up humor zaniness and all kinds of entertainment while it also educates.

Eyewitness DVD - This video includes stunning visual images with narration performed by Martin Sheen to help us understand more about what it is we are seeing.

Animal Life in Action - Ansects and other Arthropods

Whatever you do have fun with it, and do your best to be amazed with the cool things these creepy crawlies do rather than creeped - it'll help your child feel more confident outdoors to know that while some things may bite and caution should be used, many "bugs" are perfectly harmless.  Because your child will know the difference between them he or she might even suddenly become more helpful with the outdoor chores. A person can dream can't she? 

Wednesday, May 2, 2012

Outdoor Art


During my final internship at Webster Groves in St. Louis Mo, we took the Middle School on 
Andy Goldsworthy
 a  Bicycling/Camping outdoor adventure and had a blast during one afternoon completing artworks inspired by Andy Goldsworthy.  I have used this little project ever since and it has been successful with every age group.  The wonderful thing about this one, is that for preschool it can be all about relating to the seasons, for elementary kids it can be about relating to the environment, observation and awareness of the world around them.  As they get older and move into the upper elementary grades, it can really be about the ART, using color and positive and negative space etc to depict an emotion or abstract idea.  Add a structural/ sculptural requirements and then the added dimension of balancing and engineering their piece to make it three dimensional becomes an additional challenge.

There are other artists in this Earth Art movement.  In fact
Robert Smithson
, Robert Smithson coined the phrase.  However, Andy Goldsworthy's are  my favorite.  The kids seem to really dig his art as well.  With the middle school kids it was wonderful to have them each do a small art piece on their own, and then have them come togther in teams to build three dimensional art structures.  This way, the project became an excersize in planning, teamwork and the physics of balancing and counterbalancing the natural objects they found to use.  It was a long process and really did take the bulk of a day working together, but along the way we uncovered and learned about "minibeasts" in the 
Student Artist
 soil, under rocks and even with classes along the coast in the sea.  We also learned a lot  about each-other, conflict resolution and the artistic process.  I have a very simple, but beautiful spiral pictured here and remember, each object also had to be found.  I am also showing some of the three dimensional types of sculptures one might create below.

I highly reccommend this particular activity, and if you homeschool, I even recommend repeating the activity once per season for an entire year.  Make sure to photograph your artist's work.  Even in the samples of work shown here you can see how season impacts the work created in amazing ways.  I also reccommend repeating the activity every few years and watching how the sophistication in the work changes with your child's.


 You can focus on the media that is used during any season, but seasonality as well as location really does affect color availabilty.   Artworks can be a study in contrasting colors when you have brightly colored fall leaves, or spring's flower petals, or they can be a study in complementary colors on almost any day.  In winter, work might be a monochromatic study, or you might focus on using positive and negative space with the bright white of snow against dark rocks or damp earth.  It is up to you what you want to "assign" or whether you want to just let your kids explore in a much looser way.  Strict guidlines and more lax ones have both worked with my kids. It just depends on what your objectives are in the lesson presented.  Have fun with it!

Watch Andy Goldswrthy's Rivers and Tides
Alice's Goldsworthy Inspired
Spring - Alice
                                                                                                      

Rainy Days


Rainy days have always been known for being tough on kids.  In fact, "The Cat in the Hat" choses a rainy day to reek havoc on the two children in the story simply because they were cooped up inside.  While cold, wind and wet are cause for concern and such weather may make you want to shorten play time outside, they don't have to prevent it all-together.  

It is pretty well established that outdoor time is a key ingredient in growing up balanced, confident and healthy.  So why should a little water get in the way?  Some rainy day activities to consider:

Have your child put on some rubber boots, clothes that can get a little muddy, and a warm jacket underneath their over-sized rain coat and . . .

1.  Encourage a full-out-splash war.  Your kids will probably be especially impressed if you join them and everyone will be getting a little exercise together.  When they wear themselves out, or you deem they're too wet and getting cold, bring them in for a warm bath or shower and a steaming cup of hot cocoa.  

2. Hand over a camera (perhaps disposable?) and ask them to go on a photo hunt.  They can get pics of a pile of wet leaves, a rippling puddle, someone with an umbrella, a soggy pet, a tree trunk that has dry and wet spots, a reflection in a puddle, a splash, something dripping, a break in the clouds (when one exists), his/her own rubber boots in a puddle, a bucket or watering can that was left out and is now filling. . .

3.  Look up "Andy Goldsworthy" with your older child (upper elementary - middle school) and study some of the artwork he has done with wet leaves.  Challenge your child to get creative in nature and create something just as beautiful with wet things in your yard.  Record his/her work of art with a photograph.
Andy Goldsworthy images typed into google will bring up selection of wonderful photos to use for examples.

4.  For younger children:  Have your preschool child color on absorbent paper such as white construction paper or a coffee filter (paper towels tend to disintegrate quickly but they will work with care) or watercolor paper.  Take the piece of art out during a down pour for just a few moments and watch what happens to make the art truly unique.  With Kindergartners and First grade students this can also be an activity to introduce capillary action for science.

When they're done, use the cold as an excuse to spend a little time together doing something cozy and warm.  Try making some peppermint "gourmet" cocoa (Simply make cocoa the way you normally would, but stick a candy cane in it and top it off with whipped cream and a few sprinkles).  Snuggle up under your favorite blankets and read a favorite book together, watch a great movie, or just talk about how much fun it was to go outside and enjoy the fresh air even in the rain.  


Here are six of Our Favorite Rainy Day Books for any age:

  • Wheedle on the Needle, by Stephen Cosgrove.  Serendipity, 2002.  This one is for those children familiar with the Space Needle:
  • The Very Cranky Bear, by Nick Bland. Scholastic Press, 2008.  So funny my preschoolers asked for it over and over again.
  • Bringing the Rain to Kapiti Plain, Verna Aardema.  Pan Macmillan, 1981.  Wonderful Classic based on a Nandi Tale (Kenya).  Set to the same structure and Rhythm as The House That Jack Built, it is really fun to read aloud.  There is a wonderful reading rainbow episode centered around this book as well.
  • Bear Feels Scared and Bear Snores On, Karma Wilson.  Simon and Schuster.  Multiple editions of both are available.
  • Tiki Tiki Tembo, Arlene Mosel.  Henry Holt and Company, 2009.  Another Classic, this is a tale about the significance of names and how a culture chose to always use short names for their beloved children.  Wonderfully rhythmic, it is a fabulous read-aloud book.

Some other lists to try:

  • www.carlemuseum.org/blog/?p=3751
  • forthunt.patch.com/blog_posts/five-picture-books-for-a-rainy-summer-day
Andygoldsworthy:
  • www.ucblueash.edu/artcomm/web/w2005_2006/maria_Goldsworthy/TEST/index.html
Heard of other activities to do in the rain that you have tried or plan on trying?  Please feel free to share.

Saturday, April 28, 2012

Watch a Fruit Tree

This activity is perfect for kids up to about kindergarten or first grade.  It may seem like a long time to watch a tree over an entire year, but it helps kids connect to nature in new ways.  A full understanding of how weather and seasons cycle in your locale.  Start by choosing a fruit tree to observe throughout the year.  Sketch or photograph your tree once each month to observe how it changes from month to month.  Make sure to take note of the weather.  At the same time, observe the tree for other life as well.  What kinds of insects and birds are visiting it?  How many of each do you see?  Do you see more or less than the month before?  Are there any animals living in or around it?  You might even increase your frequency of checks during the spring and summer months to once per week.  Your child will learn more than you can imagine from this simple activity even if you miss a month - chances are, once invested, your child won't let you forget anyway.

As an accompianment to the activity you might also read "The Giving Tree" by Shel Silverstein, "The Great Kapok Tree" by Lynne Cherry or any number of other wonderful books about trees.
Bonus Activities:
  • SCIENCE AND MATH:  For kids in elementary school, once you've finished collecting your information you could make a graph showing temperatures from month to month, frequency of visits from pollinators from month to month, or any other numeric data you recorded consistently along your tree observation journey.  To really take it to the next level, you could ask something like, "if the temperature on the day you observed the tree seemed to be related to animal activity around the tree".  Graphing is an important skill in both math and science education and if your child is invested in what is being graphed, he/she will learn a lot more from graphing something "real" to him or her than from doing worksheets about somebody else's graphs and information.
  • THE ARTS:  Ask your kids if they can artistically show their tree in all four of the seasons - this might mean drawing or painting (no the picture here was not done by a child), or it might mean they choreograph a dance that shows how their tree changed, or it could mean some sort of animation if you offer up a video camera and some clay or LOTS of paper. . .