Showing posts with label Map skills. Show all posts

Monday, February 4, 2013

Making your Neverland Coastline a Map

If you have not already checked out the Unit Resource Page, or the beginning steps, Modeling Your Neverland and Neverland Topography, simply click on their titles to link to these first steps and instructions.

Now that your child has a map of the coastline of his or her Neverland, he or she can fill in the land with landmarks and a variety of habitats.  In an open space on the map you'll want to place a Legend box.  Explain what a legend is and then fill it in with some of the kinds of symbols your child feels is most appropriate for his/her map. 

Encourage your child to include:
Forested Areas, Desert, Grasslands and other types of familiar terrestrial ecosystems,
Streams, Lakes, Rivers and other aquatic/marine ecosystems,
Magical landforms of his or her imagination - perhaps gumdrop fields, or an ice-cream glacier.

A Town or two and a "capitol city" with roads or pathways connecting each of these locations.

For older children, you might want to explicitely guide them into thinking about how the topography effects the likely habitation of the land.  To do this, overlaying their political information on their topographical information might help, but keep the topography lines very light so that they are mostly "covered" by the new map information.  Too many lines of equal darkness can become confusing.


You can see what Alice did in her map above.  You can also see how I gave her a couple of examples of symbols in the legend and helped her with the actual writing of the words in the legend some.

The map you see above is really only a beginning.  Over the top of this, can be added symbols for towns and cities, as well as names for locations right on the map.  To take the final steps, make light pencil lines to create a straight line where-ever a name is needed.  For example, over the central area of the "lagoon" in the middle.  Then have your child give a place name for each location. 

This is a fabulous chance to introduce or review proper nouns versus common nouns.  A lagoon is a common noun, but once it is named "Mermaid Lagoon" it becomes a specific place, similar to "girl" being a common noun but, "insert daughter's name here" (or use boy and a son's name) is a proper noun.  It is your child's job to offer up the proper nouns now for his/her Neverland.

Tuesday, January 22, 2013

Neverland Topography


To create a topographical map of your Neverland, you will need to have Created a Neverland in the first place.  The directions for doing so are given on the linked article.

Materials:

In addition to the materials used in creating your Neverland, you will need a toothpick or other pointed tool to scratch lines into the dough used for your model, a ruler, and a way to secure the toothpick to the ruler and still be able to move it again.  We used scotch tape and a firm grip.

What to Do:

  1. Choose and increment and attach the tooth pick to the ruler at a low increment that makes sense for your child's island (and age).  For example, Alice's Island rose to about two inches and at age six she still struggles with precise fine motor skills so 1/2 inch increments made sense to demonstrate topographical lines on a map, while not over-doing the project.  If she was a little better and precise action with her fingers, I might have had her do 1/4 inch increments.  Likewise, if her island had had little to no relief (was relatively flat) we would have needed smaller increments to give her something to measure. 
  2. You can see Alice "scratching out" her one inch increment in the picture below.
  3. Trace the scratched lines in much the same way as tracing the coastline of your Neverland.
  4. Add a key denoting the elevation line increments and a title stating what the map is depicting.


Once all the Topographical lines are traced, you can make a copy onto a regular piece of paper, or use tracing paper to get the topographical lines transferred onto paper on which your child can color in the rest of his or her map.  If you plan on doing the whole unit, you may want to have at least three copies of the map.  In the picture below, you see Alice tracing her lines of elevation onto her topographical transparency with a Crayola Dry Erase Crayon (not a paid advertisement).


Discuss with your child how the closeness of the lines show steep inclines.  Where there are "steep slopes" or "cliffs" the lines come really close to one another, but where the lines are further apart the land moves like a gentler hill.  Compare this map with some other topographical maps to help your child see a "real" topographical map (Printable online topographical maps) and how it represents important information to those moving around on the land that was mapped.  For example, I suggest having your child pick out the shortest distances to travel up a mountain side and then also find routes that would be the "easiest routes" even if they are longer.  What kind of additional equipment is needed for the shortest route? 

The beginning of the Neverland Unit Article is linked Here.  Don't forget to also have your child make a political/ecological map of his or her Neverland.  For instructions, click here.

Creating your Neverland Model

To help your child be prepared for this lesson, you will want to have lots of maps available for taking a look at before you begin.  In fact, I suggest having the maps lying around for a few days before and after this lesson in such a way they are easy for your child to access.  In particular, maps showing islands or whole continents will be most exemplary.

Other Materials:

clay or dough that won't dry out.
Airtight container with lid and stiff sides.
sculpting tools (optional - even toothpicks can be handy for the purpose though)
Sketch paper.
Dry erase crayons or markers.
A Hard and clear surface (I have a Plexiglas clipboard, but any surface the child can see through will do).
Overhead projector transparency sheet.

Make sure to point out the legend on the maps you are looking at for examples as well as the thought that a map is made in such a way as to give the user of the map a view as though one is flying right over the land and looking down on it.  Then, using clay or playdough, you'll want to actually mold an Island.  This one is your example.  While molding your own version of Neverland, show your child how to shape the dough so it makes beaches, hills, cliffs, plateaus, mountains, peninsulas, bays and lagoons.  If you want to do the landforms extension, now is the time to discuss the different landforms you want your child to learn.

It is also probably a good idea to have a "brainstorming session".  For this session, simply list all the things a good Neverland must have in the eyes of your child.  Are there fairy cities?  Should there be a pirate ship anchored in a cove?  Does your child's Neverland have animals from our world or only magical ones?  Which kinds of animals from our world?  Polar Bears, Pandas, Grizzlies or no bears at all?  Which kinds of magical ones?  Unicorns? Dragons? Wyverns? Wangdoodles?  Are there great big cities anywhere or is it mostly wild lands?  For any of the animals that exist, the child will need to incorporate the appropriate type of habitat for that animal into their plans.

If you plan on skipping the topographical portion of this activity, you'll want to read Chapter Four, while your child draws his or her island and move on to Making your Neverland Coastline Map.

While you read Chapter Four, your child can work on sculpting his or her Neverland.


When the clay model is completed, it is time to learn to "trace" its coastline. 

Place a piece of Plexiglas or other clear and hard surface over the top of the container the Island was built in.  Hand over a transparency and the thinnest dry erase marker you can find.  Start by tracing the island while looking at the tracing surface at a significant angle - 45 degrees should work nicely.  Show your child how looking at an angle distorted the map.  Erase the transparency and then have your child trace the coastline carefully again, this time looking directly over the center of the island.  This is also a tougher task than it appears so be patient and if a few tries are needed, just know your child is practicing his or her fine motor skills.  Particularly if you have a very young child (third grade or younger) if this is a struggle and becoming overly frustrating, "trace" the coastline together with both of you holding the pen.

For very young kids that will not also be creating the topographical map, just letting them sketch the outline of their island will suffice, but if you plan on doing topography as well, your child will need to practice tracing the coastline more than once  to get the coastline down in a precise manner.  You will want two copies of this coastline map.  One for the activity, Making your Neverland Coastline Map, and one to use in continuting with the Topographical step.

For the first Post in the Neverland Unit Series; Click Here.  

 Landforms Extension:

In order to use this opportunity to expand your child's vocabulary, introduce your child to a variety of landforms.  A few are already listed above but you might add, alluvial plains or deltas, an isthmus, sand bar or spit, reef, atoll, haystack islands, tombolos or tied islands, valleys, canyons, any number of other landforms you might frequently encounter where you live.

Here Alice is looking up different types of landforms

Make sure to take a look at what each land form looks like in photos or pictures of the land form itself as well as how it is mapped out on more than one example from your atlas or map samples you have out for the project.  Then give your child a list of landforms that must be included on his or her Neverland and encourage your child to start molding.  This task is tougher than you might think, so I suggest molding alongside your sweetie pie and if actually forming the clay into a particular land form is tougher than you thought it would be you can problem solve together.


NatGeo Land Form Education Resources

Tuesday, July 24, 2012

Upside Down Hike

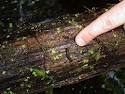
Looking for something different to do this summer?  Go on an upside down hike.  This hike is not taken walking on your hands - though if you can walk on your hands up the hiking trail your young child will LOVE you for it (talk about coolest parent in town!).  Instead, it is an upside-down hike because you turn over rocks and logs and things to see what you can find underneath.  You are turning things along the trail upside down.  Wear a pair of gardening gloves (prevents most scratches and bug bites), sunscreen and a wide-brimmed hat.  I also recommend wearing long pants to avoid brushes on the legs against thorns and toxic plants.  Review your toxic plants before you go and avoid poison ivy in addition to anything else that might cause problems like nettles.  It also might be helpful to have a magnifying glass and field guide about amphibians, insects and reptiles common to your area.  You can find all kinds of things under rocks and logs that will be fun to observe.  Please try to mind your trail manners and return rocks, animals, logs, twigs and any other native object you move back to its original position before moving on further down the trail (this keeps the interesting life you've uncovered, healthy and alive).  Enjoy what you see together.

Art/Science: practice sketching some of what you see along the way together.

Writing Skills: Have your child write a description of a favorite critter that was found along the way.  Or have him/her sit quietly and describe what he or she observes while sitting there.  Suggest using all the senses as starting points for this type of a journal entry.  What does your writer see? smell? feel? etc.

Geography/Map Skills: Make a map of the trail as you walk it, draw in landmarks together.

Reading/Literature (mostly non-fiction): Check out any of the numerous books on insects, lizards, or reptiles you might find under the rocks and logs you overturn.  A perfect one for this activity is Minibeasts Under a Stone.  Read the books together before you go and then make a picture book together of your finds after you've returned.

Science: Learn what makes a bug a bug, and an amphibian an amphibian etc.  There are numerous book resources about this topic and activities to do to really make learning about these critters fun. If you really want to learn more about Creepy Crawlies spend some time with it and make your upside down hike the introduction or the finale - either way its lots of fun.  Here is a link to many internet sources and not surprisingly, the San Diego Zoo also has some info on the matter for kids.