Showing posts with label Math. Show all posts

Monday, October 1, 2012

The Halloween Graph


Make a graph out of your Halloween Treats and Learn something in the process.  Activity is aimed at early elementary

1.  Create a grid on a poster board where the squares are fairly large (these are two by two cm - see photo).

2.  Pull out any treats that are particularly large and won't work for the activity.  Set those aside.


3.  Have your child help you "sort" your candies and place them on the grid so that each candy only uses one sqaure (in at least one of the directions)  - See photo

4.  Have your child think about what the graph represents by comparing the "results" of their study.

5.  Let your child eat one or two of their "treats".

Learning advantages:  
Sorting Practice - how will you sort yours?  By brand?  By type?  By flavor?  Nuts, vs no nuts? Fruit flavor?  Hard vs. Chewy?
Introductions to Graphs and Pictoral Representation of Numbers
Comparing and Contrasting Practice.


Originally Published on "Homework Club" Site 2010

Friday, September 21, 2012

September's Nature Journal

Since fall is the time of the harvest, what better way to do a nature journal entry than to do a search for different "fruits" in the wild. 

 
Botanically speaking, fruits are the swollen ovary that provides an additional covering over the seeds. This would include things like, tomatoes, squash, cucumbers, seed pods, rose hips AND the things we typically think of as fruits such as apples and pears. 


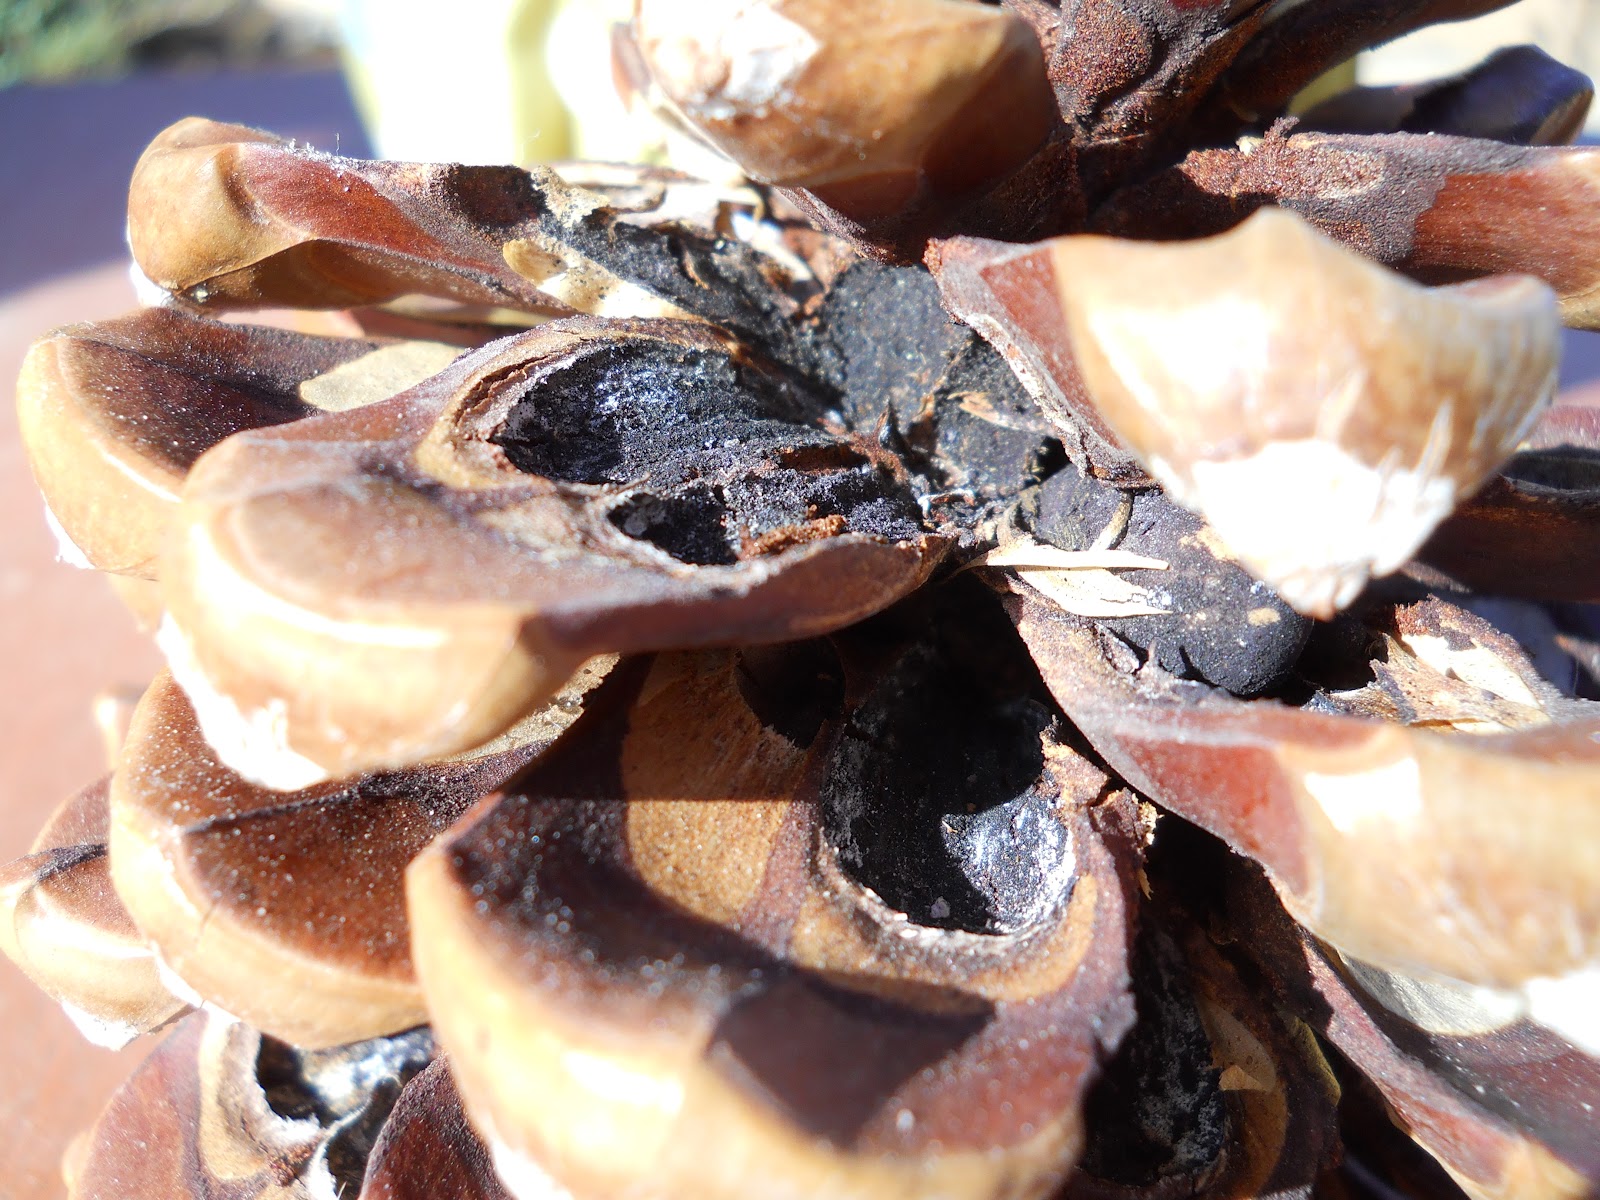
After you've gone on your hunt and found seed containers of all kinds (pine cones aren't officially a fruit but they sure do contain seeds), have fun drawing their outsides, pulling them apart and drawing the seeds and comparing all the different ways seeds can be protected as well as the different colors and shapes of the seeds.


Art and Observation:

The really cool thing about this one is that for older kids they can practice their drawing skills by sketching the seed container from different angles BEFORE opening it up and the also sketching the seeds and interior of the fruit.
This Poster botanical print is from zazzle.com.
Alice's are not nearly this sophisticated (nor mine),
but I have known highschoolers capable of this kind of work.

For your beginners they can practice their shapes by sorting their fruits into fruits with circles, rounded triangles, rectangles and ovals (and whatever other shapes you might find).  Then, they draw the shapes and color in the shapes to match the color of the fruit or seed container they are trying to depict.

Science and Math:

Try to hypothesize about how the seeds travel.  Are they the kind that catches on fur and clothing?  Are they the kind that travel great distances on the wind?  Do birds eat it and then "plant it" the fertilizer they provide when the seed comes back out?  Kids should describe what evidence they see in the seed that makes them believe their hypothesis is correct.  Make a table in which they can actually tape samples of seeds (and/or fruits) when small enough, or draw what they are seeing.  Maybe later you can even do a little research and confirm or rule out the accuracy of their hypotheses.


Writing:

The key to really great fictional writing also often lies in the descriptive passages in the writing.  Emotion is often demonstrated through describing the things that characters keep around them, where they live and in expression rather than stating emotions and feelings of characters directly.  Nature journaling is a GREAT place to practice descriptive writing.  Have your kids choose one "seed container" they'd like to describe.  For your preschoolers, ask for a verbal description of smell, sound, feel (texture), and visual characteristics.  Simply take a dictation.  Your Kindergartners should be able to write 2-3 sentences and older kids can write even more. 

Bonus Follow-Up Possibility:

Collect a few samples of each type of seed you find and bring them in to compare to the seeds of fruits you cut open to eat over the next month.  Kids can practice comparing  and contrasting their "wild seeds" with the more familiar domestic seeds.  You can also take a look at, "A Seed is Sleepy" by Dianna Hutts Aston.  The book is full of beautiful examples of the huge variety of seeds there are in the world and how they spread. 


Monday, September 17, 2012

How the Romans Counted

Obviously, this one is all about Roman Numerals and having Alice be able to use Roman Numerals Proficiently is NOT my main objective right now (she has only been introduced to subtraction recently and she still uses her fingers to add past ten for most facts that add up to something higher than ten).  However, since we were studying Ancient Rome (click link for more general resources), I did feel Alice should at least be introduced to Roman Numerals, so did a little research to find resources and I'm including those here. 


In the photo, you see Alice using a "stylus" (which is actually a kebab skewer) in "wax" (which is actually air-dry clay) the way students in Roman Schools would have done (something we did to "experience a little Rome").  She could rub out things she needed to re-do the way they would have then with wax.  She really seemed to enjoy this approach to learning while doing a cursory introduction to Roman Numerals. 

I was a little unorthodox, because I didn't tell her anything about how Roman Numerals work (like that when you put a symbol before another symbol of lesser value it "subtracts" from that symbol and that you add the symbols in a row together to calculate the number represented.  I just gave her a couple of key examples and then expected her to look for patterns to find out those rules herself.

First, I gave Alice something akin to this visual:

I  = 1
II = 2
BUT  IIII  does NOT equal 4.

V = 5 and
X = 10.

For Alice, I basically said, "If this is __, that how would you write ____" and just treated the whole thing like a fun puzzle.

For example, I started with, How do you think they wrote 3?

I said, if XI = 11 and VII = 7 how would the Romans have written six?

And, if XXII = 22, then how would the Romans have written 33?

The toughest one for her was to use IX = 9 to figure out how to write 4 and 14.

I did not get into L, C,D, and M with her and used it as an opportunity to give her critical thinking practice more than to truly educate her in Roman Numerals.  If you ARE tyring to totally educate your kids in Roman Numerals, here are a few useful resources.

After I had done this lesson with her, Alice started noticing Roman Numerals here and there and we discovered a picture book titled "Fun with Roman Numerals" by David A. Adler that has turned out to be a lot of fun.   It explains the Roman numeric system quite nicely and even highlights different times we still use Roman Numerals today.  The pictures are bright and add whimsy to the book.  We will be checking it out again when Alice needs to learn how to use Roman Numerals for real in a couple of years.

Leveled Book (must register to download)  and Worksheets (primary)
Program to make your own worksheets
Lesson Ideas
Arabic to Roman http://www.aaastudy.com/g1_28wx1.htm
Roman to Arabic http://www.aaastudy.com/g1_28xx1.htm


Wednesday, August 1, 2012

Fractions While Baking

Apparently Alice has decided she wants to help me by Vlogging about things she's learned.  So here are a few moments from our kitchen spliced together about fractions.  This was just before we made our "Star Spangled Pie".

You can see how we experimented with quarters, and halves.  This is after years of baking together and having her do the measuring so she was fairly familiar with the vocabulary already when we started this.  I had never had her explore the relationship between the different measuring cups before today though so this really is her first introduction to fractions in terms of what they are and mean.  She had to do the quarters part a couple of times - hence the splicing together (you probably don't really want to watch all the gobbly gook in between).  I pointed out to her that one quarter was written with a 1 over a 4 and explained that meant that four quarters would come together to make one whole cup.  Then, it was just a matter of testing out whether or not mommy was right.  I also explained that if we divided a candy bar every one would want even parts and a fraction is just splitting something evenly.  I then gave her the cup for 1/3 and asked her what she thought of that.  She figured out (through testing it) that it worked the same way and that three thirds fit into the 1 cup measuring cup.  The part on the video about halves we had not done yet when she told me to "hit rec" so she was able to make the leap from quarters and thirds all on her own to the halves.

This is only one reason, I seriously recommend spending time together in the kitchen.  For more examples of things kids can learn in the kitchen, check out this blarticle, Food Math.  They'll learn a ton.

If you are having trouble seeing the video by clicking on the image, you can also try it on Youtube, by clicking on this Link.


Monday, July 23, 2012

Pretend Mail Delivery

This activity is pretty fun, helps your child practice matching skills and number recognition, helps your child practice large motor skills, and gets your kid/kids outside for a little while doing something fun and different.

Things You Will Need:

  • Some Junk Mail
  • A pretend car or child-sized, scooter, bicycle, tricycle or other "vehicle" for the postman.  If necessary, the vehicle can be your child's own feet, but it is typically more fun in a "vehicle" with a basket, trunk or a satchel for transporting the parcels either attached to the vehicle, or safely worn by the child.
  • Large Sharpie.
  • "Mailboxes" - these can be actual boxes, big sheets of paper, or squares marked out with sidewalk chalk.

What to Consider:

The child will be "delivering" the mail to three or four "addresses" you create.  The idea here is to practice matching in a fun way while also developing familiarity with numerals.  If you have a two year old that is just getting to know and identify single digits, you'll probably want to make your addresses, single digit addresses.  If, on the other hand, you have a four year old that is happily counting to 50 or more, you might want to make things more complex by adding a few more addresses and using numbers with three or more digits (112, 1043, 3260, and 1057) for example.  It is not important that the numbers be sequential or realistic in terms of address proximity.  

What to Prepare:

  1. Using the Sharpie, cross out any real addresses or anything that might become confusing for the child.
  2. In the largest area without text on the envelope or magazine write one of the numbers you have chosen.  Make a few pieces of mail for each address.  You can also use scratch paper or construction paper with a number taped to the envelope to "cover" confusing texts and pictures if you would like.
  3. Create your "homes" or "mailboxes" and make sure each has an address that clearly matches the mail you've made. 

To Do:

Shuffle the Mail, hand over to the postal worker and let the deliveries begin.  Play along, wave to the post person, sign on a clipboard to accept a package delivery, involve the neighbor kids as "other neighbors" to receive mail. . . You get the idea.  

Variations: 

You don't have to use this exercise only to practice math.  It also works wonderfully with colors, shapes and anything else you might like to practice matching - just pretend the concepts to be matched are the address.  You could even do an exercise with Capital Letters on the "homes" and their matching lower case versions on the "mail" to be delivered for pre-reading skills.

Tuesday, June 12, 2012

Taste the Rainbow: Teaching Colors and graphing with Candy

Teach your child his/her colors and graphing skills using your favorite bite-sized candies.

First create a "graph" without the info.  You'll need an x and y axis - at 14, ours was a little small  for a single bag of skittles, so I recommend going to 20 on your vertical axis and then list the colors along your x, or horizontal axis.

Please remember to title each axis and the whole graph.  This is something that I notice goes over-looked even in many elementary school workbooks, but to a scientist it is a little like not crossing your t's or dotting your i's.  It may seem like such a detail is relatively insignificant and in most cases it probably is, but simple things like not including titles on graphs or units of measurement can mean the difference in monies for further studies and expenses to a professional (NASA, actually spent a couple million on a mistake because of dropped units).  It can also mean the difference between life and death in medical applications.  It is just good to begin well and be a stickler about such things from the start.  If your child or children don't become doctors - ah well, they still know how to label things properly right?


As an example, think about the photo above.  I purposefully left out the units on my y axis (number of skittles).  You can grasp that piece of information from the context of the rest of the graph, but what if the graph was really about a study we did where we asked a bunch of people what their favorite color was?  Perhaps each unit really represents 10, or 100 people who feel that color is their favorite flavor.  The graph takes on a different significance and meaning with this slight alteration.  It is in the titles and units that this kind of information is made clear.  If your child is past learning colors and is really focusing on graph skills, this might be a good activity to do.  Ask every family member (even distant aunts and uncles) and friend their favorite flavor, now graph it that way and compare the two graphs.  What changes must be made clear in how the graph is made to make this difference clear to a reader that does not have that background information?


If you are working with a younger child and the purpose is to introduce graphing,
  1. Show your child the graph you've pre-made and Ask the question:  I wonder which color is found most in a ______ bag/ container.  You could use m&m's, Skittles, Starbursts, sweet tarts...
  2. Open your candies and organize the candies by color, stacking the candies on the grid as shown.  Speak about the colors as you do this repeating the color names over and over again.
  3. Count each "stack" of candies and ask the question again.
  4. Now ask your child if there was a way to tell which color had the most without counting.
  5. Allow your child to have a handful or two - and maybe eat a few yourself.  Follow up again on another day with more questions.  Does every bag of skittles have the same numbers? - test it out and then make a graph to answer that question.  Can we graph the favorite flavors of friends?  Do other candies get split by color in about the same amounts?  Be creative and have fun with it.   


Monday, May 28, 2012

Unit Study Centering on Rocket Boys by Homer Hickam

One of my favorite books to share with my Middle Schoolers was Rocket Boys by Homer Hickam.  Because of the fact that I specialized in teaching twice exceptional kids for the last three years of my career in Middle School science, I found it especially rewarding when I got to share it in a small group setting.  My favorite go around was with a group of 12 boys that especially liked the part where the Rocket Boys blow up a fence.

What is so wonderful about this book is that it is so rich with character, history and science.  I was able to allow my classes to delve into all things rockets (science) and any part of the book that included trial and error - that was for the science classroom.  My wonderful co-conspirators in engaging kids in learning, the English teacher and the History teacher, enjoyed picking apart the book with me and laying claim to certain passages for their classrooms as well.  The math teacher also enjoyed her hands-on trigonometry to help them ascertain how high their rockets had went after we had our "blast day".

I have to warn this is a HUGE topic and the unit took a lot of time out of the school year - we spent five  weeks on it!  However, it was efficient learning because they were completely engrossed in the project, practicing learning how to learn, using real life application and being exposed to tons of information they will not forget all at the same time.  If you look, you will realize that two major science topics were covered in those five weeks as well as a lot of technological history most kids don't get.


Sub-topics to which the book closely relates:


Literature: To be honest, I'm not entirely sure what the kids did in their English class specifically related to the book.  They did do a lot of writing and practiced their grammar and editing skills within their own writing assignments.  They also did some character and plot analysis.  I'm sure they discussed a number of themes within the story and learned a number of vocabulary words.  In particular, I remember catalyst being one of those important vocabulary words that was discussed in all three classrooms.  I'm sure in English they were identifying catalysts in the boy's lives.  In History, they discussed watershed events as catalysts for changes in society and in science we discussed it as a chemical term as well as its relation technological development and historical developments.  Here are some resources for ideas about discussion questions, essay questions, tests other teachers have used and a vocabulary list created by teachers in Coalwood.

Interested in an author study?  http://www.homerhickam.com/
Discussion Questions: http://www.homerhickam.com/groups/ideas.shtml
Vocabulary List: http://www.homerhickam.com/educators/vocab.shtml
see below for many more ideas.

History: 
Obviously the historic center of the book is about the launching of sputnik and the most direct relationship is to the part of history we refer to as the "Space Race".  There is a host of information, videos, activities, books etc. about this era as well as about World War II and the many factors that led up to the space race.  To truly understand the fear faced by the population during the 1950's and 60's kids will have to understand about the nuclear threat as well - hence the relationship to nuclear technology listed in the science portion of this article.

Cold War Ideas and info:
http://wars.mrdonn.org/coldwar.html
http://www.neok12.com/Cold-War.htm
http://www.history.com/search?search-field=Cold+War&x=0&y=0

Specific to the Space Race:
http://www.history.com/search?search-field=Space+Race&x=0&y=0
http://dsc.discovery.com/search/results.html?focus=site&query=Space+Race

Make sure to take a look at Discovery Channel's "When We Left Earth" narrated by Gary Sinise.  Great Documentary done in six episodes.  Of course, if you really want to get into it there are plenty more movies out there - even The Right Stuff and Apollo 13 can easily tie in.

Math: 
Although some of the math was more advanced than the kids would normally have done, the math teacher did work with them just before and after launch day to help them understand the math involved in figuring out how high the rockets had soared.


Science:

The Obvious: 
Aerodynamics, Rocketry-related chemistry and the scientific method.  Unfortunately for us, we were in a high fire hazard area so doing combustion rockets was out of the question so they also learned about pressure, force and motion while we built bottle rockets.  It was easy to relate the scientific method.  As they read, the kids had to keep a "journal" of questions, hypotheses and the related trials and errors the boys made.  They saw first hand how each experiment led to more questions and more experimentation.  We related this to other science lessons we'd learned through the year in discussions, essay questions, and in their own experimentation throughout the unit. 

http://www.instructables.com/id/How-To-Make-A-Bottle-Rocket/
http://er.jsc.nasa.gov/seh/Bottle_Rocket_Launcher.pdf
http://teachers.net/lessons/posts/887.html
Combustable liquid bottle rocket: http://www.reachoutmichigan.org/funexperiments/agesubject/lessons/other/liquid_bottle_rocket.html

The Less Obvious:
Mining and Coal Production.  Before starting in on rocketry, we did spend about a week on mining in general.  They largely get the basics in minerals in Earth Science in sixth grade, but rarely do kids really spend any time learning about mining.  Each kid chose a type of mineral and did a short report on the production process for that mineral and how we use it.  I also had them do "cookie mining", and we listened to "Allentown" by Billy Joel.  The lyrics were broken down in English class for their poetic value as well as to compare and relate the tale told in the song to what was happening in Coalwood in the latter half of the 1950's.


http://teachcoal.org/
http://www.squidoo.com/RocketScience4Kids
http://www.vssec.vic.edu.au/wp-content/uploads/2010/05/the_history_of_rocketry.pdf
http://www.essortment.com/kids-information-rockets-55603.html
http://ethemes.missouri.edu/themes/1736


The Even less Obvious:
Nuclear Technology - just because of time constraints I separated this into a different unit, but made sure it was fully covered before we did Rocket Boys so if a quick review was needed, it could easily be included. 
http://www.ne.doe.gov/students/teachers_middleschool_activities.html

Please Check Out the Book "Ten Things All Future Mathematicians and Scientists should Know" by Zaccaro if you can find it.  I incorporated the lesson on the Challenger within the unit as well.  It really stresses the importance of communicating findings and listening to the results of those findings before moving forward in a way kids relate to.  Its a good book anyway.

This website has a host of ideas with explicit instructions about how to do each.  The lessons included here are all related to the book or movie and either Science and Math, History or English.  These are not my lesson plans, so I have not tried them all, nor have I even reviewed them all, but options even range in age starting from 4th grade through tenth grade.  I personally can't imagine even an advanced reader fully enjoying this book in fourth grade mainly because it is a coming of age story, but every kid is different and it is a fabulous novel.


Saturday, May 19, 2012

Turn Bubble Time, into Science Time

Once upon a time I "consulted" for the Kindergarten teachers at the school where I was teaching middle school because none of them felt confident with their science knowledge.  So, once a month I did a lesson in the kindergarten.  In September, we blew bubbles to learn about the scientific method, and then again in April or May, we blew bubbles to learn about geometric shapes.

For scientific method, variations to the bubble blower were the key.  We asked, "what is required in a bubble blower to make good bubbles?  We always did three sessions.  In the first session, we studied "bubble blowers" I brought in and discussed which properties they all shared and I demonstrated each blower's bubble blowing abilities.  I had different sizes, shapes, and even things like coat hangers and circles of ribbon tied to a stick.  This was our "research" session.  

For the next class, kids brought in something from home they hypothesized would be a bubble blowing breakthrough.  Kids brought in spatulas, the little tools with which you dip eggs at Easter, one kid even brought in a toilet brush (which his mom reassured me was new and unused) "because bubble wands have those fringes on them" he said.  They had to share their individual hypotheses with the class about, "what made a good bubble blower, good". 

After this first portion, They were broken into four smaller groups and each group was given a giant sheet of paper on which, The teacher's assistant, principle and myself drew pictures representing each of the bubble blowers the kids brought in (we did this as they arrived at school with their blowers).  There were already grid lines drawn ahead of time so it would become a table for recording.  From left to right the columns said,  "blows bubbles",  "blows a bubble or two", "sometimes makes bubbles with difficulty", and "doesn't make bubbles".  The group had to make a hypothesis about each blower by checking the box they thought would be most fitting for each of their blowers.  Then, with a differently colored crayon, they ran their "tests" and marked the results.  All during this, the four of us adults monitored group discussions, used scientific vocabulary as it relates to the scientific method over and over again, celebrated successes with appearances of bubbles and generally had fun being teachers and watching the kids learn while having fun. 

At the end of the session (about 90 minutes total) we spent about twenty minutes discussing our results, drawing conclusions and summarizing the day's activity with an interactive lecture/discussion method.  I always made sure to review the steps of the scientific method we had taken and associated those steps with the actual actions that matched each step.


For the last five minutes or so, I asked the kids if they had any new questions about bubbles that had come up because of their experiment.  The third session was always about one of the questions that arose during the previous session.  Size often came up and was an easy one to experiment with.  I had four sizes of circle bubble blowers, the one shown in the picture here is the smallest.  I always made sure the kids had a table to input their information into.  This introduces them to tables, instills the importance of being in the habit of recording results, and is simple for them to do.  They just mark an x in the "right spot".

At the end of the year, the kindergartners were always excited to hear they would be blowing bubbles with me again.  This time the lesson was about shape and took place after their teacher had introduced the group to three dimensional shapes.  If a circle bubble blower makes a sphere will a triangle make a pyramid?  Will a square make a cube?  You get the idea.


This bubble blowing switch blower, is from the Think Box company and was just something I've picked up in the last few years as part of a kit for something else, but it really isn't required.  I used to use bent coat hangers and they worked just fine (in fact, better than the diamond or heart on this little tool have ever worked).  You only need to be sure the join at the end of the wire is close or tight and flush or flat back to itself.  The switch blower is just easier to store and then carry to different locations with me.


Of course I have the kids track their testing on a chart, (one of which is pictured below) and eventually, they always conclude that the shape of the blower doesn't matter, you will always get a sphere, if the blower works to make bubbles in the first place.


The very last step in the Scientific Method is to communicate your findings.  Unfortunately, this step is often forgotten in science lesson plans that get published or are regularly used in schools.  Without publishing, or sharing findings though, the conclusion a scientist draws can never be replicated by peers and advancements cannot take place.  For kindergartners, communicating their findings meant telling their parents about it, making posters for the walls in the school, or drawing a picture that represented what it was they had done.


Wednesday, May 16, 2012

Jack o Lantern


A GREAT LEARNING ACTIVITY THAT PRODUCES ITEMS THE WHOLE FAMILY CAN ENJOY!
This article was first published on Facebook in the Fall of 2011.  Here it is for you to access now.

So, we carved our pumpkins today. I was determined to use as much of the left-over bits as possible. Plus, Alice and I have been talking a lot about fruits and veggies lately. We read, "Eating the alphabet" and have been looking for the fruits and veggies listed in it and opportunities to eat them ever since. That was how we discovered Ella likes artichokes. 
There are two foods we eat fairly regularly, that use Pumpkins, pumpkin pie and pumpkin loaf. We made pumpkin pie (Believe it or not, Alice actually made it, though I helped with the crust) last night, and pumpkin loaf this morning. My family always roasted the seeds from the pumpkin we carved and in order to use the scraps from the carving, I also found a recipe for a pumpkin soup. Maybe next year we will really do it right and plant some pumpkins of our own and really take the whole thing from start to finish!

Alice would have absolutely nothing to do with the actual carving though. She grabbed a scraper started to go for it and then said, "no way". When her Daddy walked in the door 5 minutes later she told him, "I don't like that ooey gooey stuff". But she enjoyed hanging out with us while we did the carving anyway.

The Pumpkin loaf was inspired by a recipe we found in a library book called, "The US History Cookbook". However, instead of putting in pecans, we put in what was probably available at Plymouth at the time of the first harvest feast that has since inspired thanksgiving.  "Craneberries" as they were originally called were the pecan replacement. Alice loves craisins so they just made more sense than adding the nuts the recipie called for that she probably would have picked off and not eaten anyway. She liked finding the step we were on in the cookbook and following the numbers as we went along.

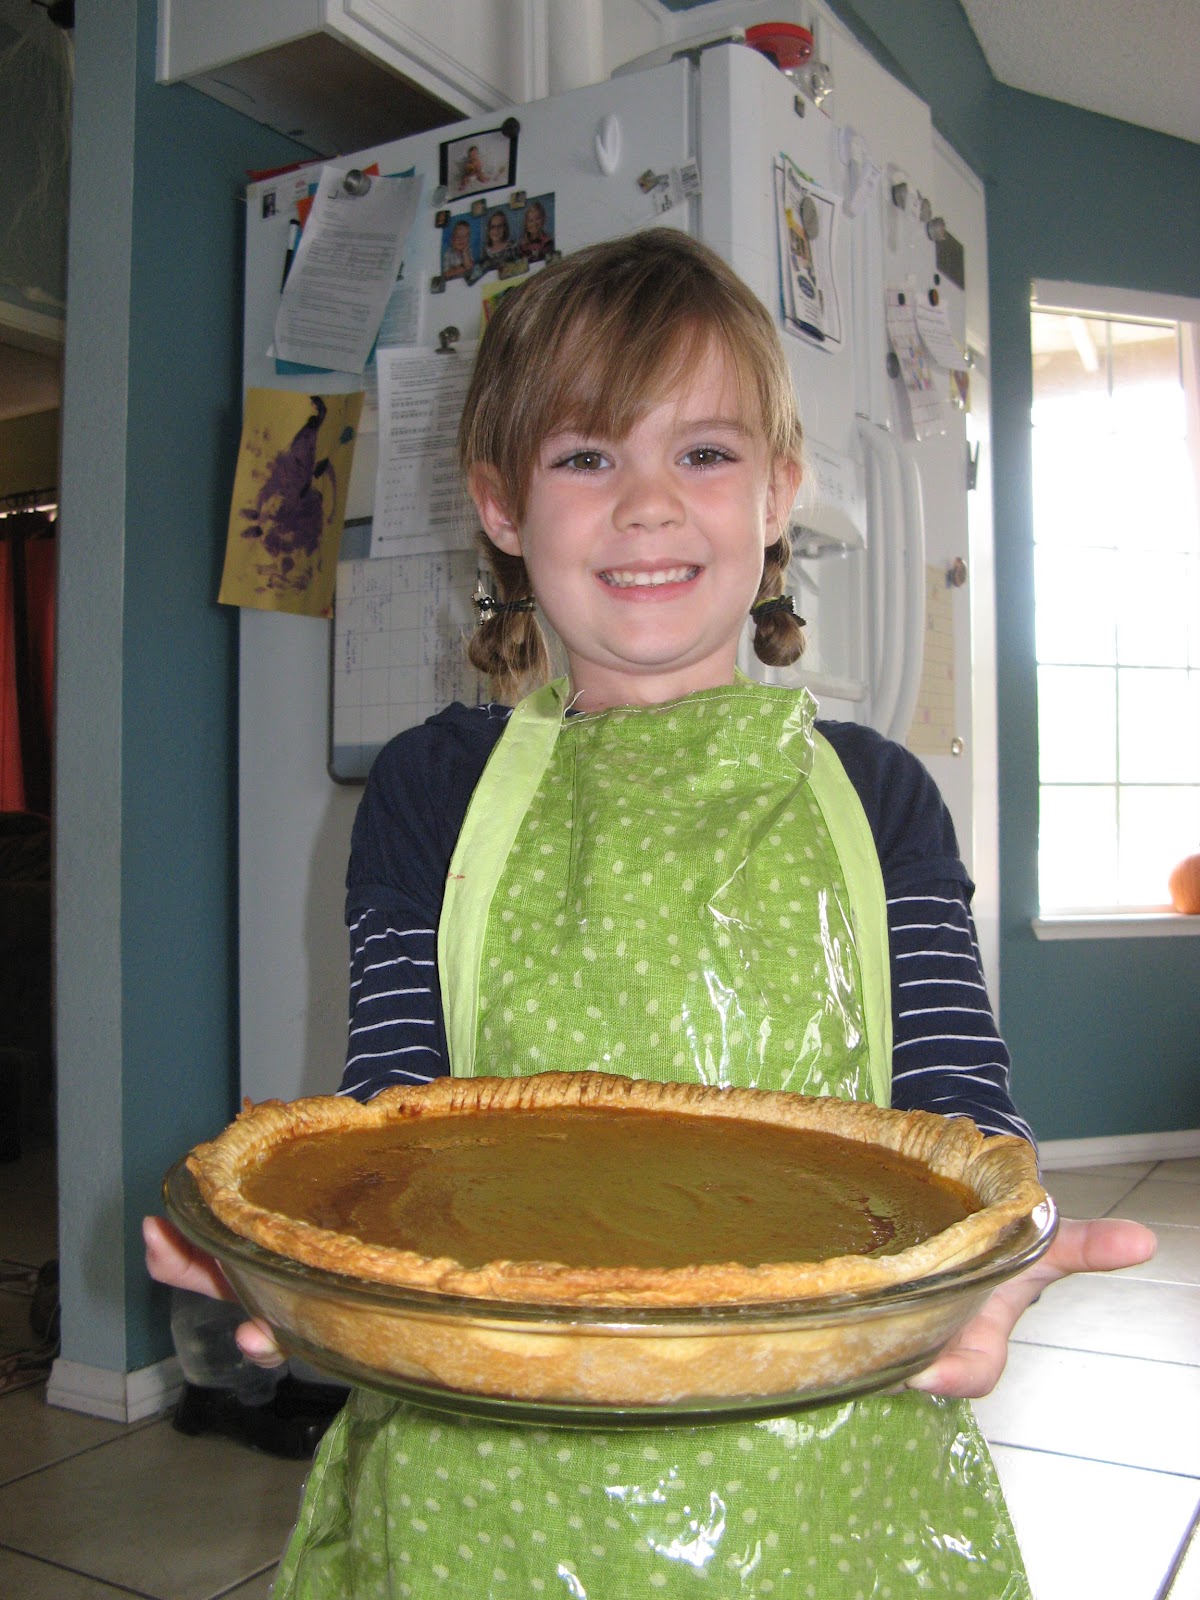
The pie was also made with canned puree and we used the recipe right off the can for that one. Alice measured out all the ingredients and learned how to read fractions while she did so, then she mixed the custard and poured it into the crust I'd gotten ready for her. She had fun doing like the birds on Cinderella, and pressed the crust edge with a fork before we put it in the oven. She's proud of her pie! She said cracking the eggs was the favorite part of making the pie AND the pumpkin loaf.

To make the soup, I sliced three large carrots and and sauteed them with 1 chopped bell pepper. Then, we carved our pumpkins and put all the stringy stuff as well as the tops of the carrots in a pot of boiling water (about 2 cups for every cup of pumpkin stuff) and let it simmer while we carved out the faces of the pumpkins. When that was done, we strained the veggie stuff from the water, and added a little salt, pepper and oregano. We roasted the bits of pumpkin from the faces in a dish in the oven and then put the carrots and pepper mixture, the roasted pumpkin, and some of our pumpkin broth into the blender and blended until smooth. I added milk to cool it down a little (and cream it up). This was our pumpkin soup. I'm sure there are yummier recipes out there, but it worked.  

Meanwhile, the seeds had been separated and put in another pot of boiling water with a 1/4 cup of kosher salt. We let it boil for about 10 minutes and then roasted the seeds in the oven on a cookie sheet once we were done roasting the pumpkin pieces.


We had a GREAT time. Alice learned how to read fractions, measure volumes, plan ahead (she helped write out the supplies and grocery list as well as choose faces for the jack-o-lanterns. In addition, although she decided to forgo the tactile experience of cleaning out the "ooey gooey stuff" she had a sensory experience with the pumpkins and pumpkin purees as well as with tasting the foods afterwards.

Saturday, May 5, 2012

How Many Seconds in a Minute? Introducing Preschoolers to Time

How many seconds in a minute?
Sixty, and no more in it.
How many minutes in an hour?
Sixty for sun and shower.
How many hours in a day?
Twenty-four for work and play.
How many days in a week?
Seven both to hear and speak.
How many weeks in a month?
Four, as swift as the moon runn'th.
How many months in a year?
Twelve the almanac makes clear.
How many years in an age?
One hundred says the sage.
How many ages in time?
No one knows the rhyme.
  - Christina G. Rossetti


Children hear things like, "dinner is in twelve minutes" all the time.  This is great for kids as it helps them establish a good sense of time (when the prediction is accurate more often than not).  Increase the frequency with which you give them this "warning" and you not only increase your sanity (they usually transition better when they get such warnings) but you'll increase their sense of time at an earlier age.

Digital clocks are pretty easy to read, but what time it is, usually means very little to most children under four. Even four-year-olds generally don't care about the time unless it relates to a specific activity.  The more regular your schedule, the more meaningful time becomes.  Many toddlers and preschool children are helped by having a poster that shows "times" like, "school time", "meal time", "club time", "bath time"  - etc.  make a visual representation of the things you typically do in a day (or week) and display it in a place where your child will see it a lot.  Then, refer to it when you state the actual time of day, or when you say things like, "bath time is in about 10 minutes - it will be seven-o-clock then".

Play beat the clock for children that are dawdlers.  
Although Dawdling does serve a purpose in a child's brain development, there are times when we just need them to focus and get "it" done.  Set a kitchen timer or other noisy clock ticking to help keep reminding your child he/she has a job to do.  Or, if the job is part of a routine, refer to my article, "Musical Routines".  Challenge him/her to get dressed (or other such task) before the bell rings or the song is over.  A prize can be as simple as, "yeah you did it! great job", a sticker for a sticker chart, or a token for a token jar.  For a more complex reward system where bigger rewards are earned after a certain number of stickers or tokens have been awarded you can actually offer up a cool little prize toy your child will enjoy.  Once your child gets used to this game, he or she might even enjoy learning to set the timer.  The experience of learning to read the correct numbers (even those numbers in the teens) helps to set them up for later when they're learning to count past ten.  When your child is helping you in the kitchen he/she will now also be able to do the job of setting the timer when needed.  The more practice  the better (Also Check Out "Food Math" for other mathematical advantages to having "help" while you cook).

Playing games with kids that involves a "time" element is also a meaningful way of giving your toddler or preschooler a sense of time.  If you are trying to count seconds, clapping your hands and then slapping your thighs (while sitting cross-legged) actually comes pretty close to taking a second for most of us.


Have a Calendar available in a busy room in your house you can refer to with your child.  Put it right next to the poster with your "daily" time chart or poster described above.  Make sure you use both regularly with your child.  Mark the calendar with upcoming important activities and talk about it with your preschooler.  See "Calendar Time: What the Calendar and Holidays . . . " for more information on ways to use the calendar with your kids to teach your kids.  Now that my child is in Kindergarten, I no longer use a daily schedule, but we do have a weekly one.  Check out "Schedule Boards" to see how I use this with Alice and how to make the components so you can have one right on your refrigerator.

Do a Subtraction Scavenger Hunt.


Math Scavenger Hunt
Place a known number of objects (that are the same) out for your child to see and count (choose a number in line with your child's skills, for example if your child easily adds to ten but has a harder time with sums equaling 15, choose 12 objects).  Ask your child to count the objects and then look away.
 imgres.jpg
Remove a number of objects and hide them while your child is not looking.  Ask your child to count the number of remaining objects to figure out how many objects must now be found.  If you started with 12 and there are 5 remaining objects, your child now gets to go find the remaining seven.  Do this once or twice and then move on.  If you make it a habit to play this game a couple of times every few days, your child is getting wonderful practice with subtraction without ever knowing that is what she/he is doing.  To maintain motivation if she/he starts getting bored with the game you could make the objects something he/she likes to collect and they get to be added to the collection once they are found.

Tuesday, May 1, 2012

Commutative Property With Dominos


Domino Math –
One math concept that really helps kids with using math facts quickly is that of the "turn around fact or pair". The concept uses the commutative property which basically says that a+b will always equal b+a.  It is not important that the child know the name of the property, what is important is that she/he encounter examples of it enough to see a pattern and use it to his/her advantage.

For example if the child is very familiar with the result of the commutative property, then if she/he knows that 13 + 8 = 21 then when he/she has to calculate 8 + 13 on a timed test, she/he can speed things up because he/she already knows the answer rather than having to calculate it.  Unfortunately, most kids do not make this connection until much later in school.  Young children usually see math problems as distinct from one another and only begin to understand and use "the rules" for themselves after they've seen the pattern form many times.  They WON'T just take the teacher's word for it.  Many courses teach the concept in one or two lessons, but don't spend enough time with it to make it truly helpful or useful to the elementary mathematician.  

This activity helps kids put a "picture" in their minds of what addition looks like, and makes it a simpler challenge because they are not also concentrating on reading number symbols, or writing number symbols that are probably relatively new. It allows them to concentrate on the concept of addition only.  After they get the hang of the activity shown in the video, it is even easy to turn the whole thing into a game.  If you'd like to do the activity my daughter is doing in the video on this page with your own child here are the instructions for what we are doing:

1. When we started, I pulled out all the dominoes that added up to 10 or less. This way the activity is not overwhelming and remains appropriate for early mathematicians. 

2. My daughter was asked to add the dots from one side to the other side and place the dominoes in piles according to what they add up to in ascending order.

3. While doing the first couple of tiles, I taught my daughter how to "read" the domino in a math sentence - i.e. "2 dots + 3 dots = 5 dots". I then asked her to do the same with some of the dominoes she picked.  We did each domino both ways so she also read "3 dots + 2 dots = 5 dots".  Eventually, they get the idea that it doesn't really matter which number you start with in an addition problem.

4. After she was done sorting we looked at the relationship between how high the number is and the increasing number of ways to "add up to" that number.

5. After knowing she understood she could start with any number she desired I encouraged Alice to "count on" by stating the higher number of dots first and starting her counting from there, "7 + 3" would be counted "seven, eight, nine, ten." As I modeled this for her, she will used this technique more and more. Once your child is confident with his or her facts to ten, go ahead and work on facts to twenty.  Once they are comfortable with this, start giving them a third domino (with no dots on one side).  They then begin adding three addends.  Continue adding challenge this way until they've grown out of the activity and you've replaced it with other methods for practicing math.

By the time we were done with one round of this game, she realized that "0's" add nothing and to check her idea said, "mommy, if I add 0 to 12 is it 12?" She was also asking me about higher numbers plus one that whole afternoon. 

Interest won't last long with this activity because it becomes repetitive even for younger kids fairly quickly. Continue the activity until your child loses interest and then don't push. They are very likely to be interested again another day whereas, if you push, they'll lose interest all-together.  


Once they've gotten the hang of it, you can turn it into a game for more than one player.  


1.  Pull out 20 or more dominos that are appropriately "spotted" for the age and ability of each child.  For example, for a group of Kindergartners, you might use mostly dominoes with one side dotted and the other blank and make sure no sets of dots add to higher than 8 or 12 etc.  For more experienced mathematicians you might skew the domino set to higher numbers and make sure there are not any "zeros".  I do not suggest using the entire box because then the game becomes tedious for all its players and your children will not want to play it.

2.  With your child or children, flip all the dominos over so none of the dots can be seen and mix them up.  Each player pulls a domino and adds both sides together.  Each player must state their domino's identity using two "math sentences" that are accurate (3 dots plus one dot equals four and one dot plus three dots equals four) The person with the domino with the highest sum wins everyone else's dominos.  Play continues until all the dominos are taken from the middle and a winner is established based on who won the most dominos.

When this game is played frequently, those playing are getting a lot of practice with their math facts as well as examples of the commutative property.  If a child is having trouble coming up with a second "math sentence" simply turn the domino around to illustrate the new "problem".  This game is simple and quick enough to be as much fun as Hi Ho Cheerio was when she/he was first learning to count, but more suited for the slightly older child.

Intermediate
Add another level to your domino math practice with dice.  Pull out a selection of 20 or so dominos.  you'll probably want to skew the dominos you pull out toward the higher end of the spectrum of sums you can get from the dominos.  Have your child pull a domino, add the two ends and then roll the die and subtract the amount on the die.  Take turns doing this and when everyone has one domino sum compare.  The person with the highest sum wins all the dominos.  Play until all the dominos are gone and declare a winner based on who collected the most dominos.  Since multiplication is really the addition of sets of numbers, commutative property also works with multiplication so if you have a child working on his/her multiplication tables this can be played using multiplication as well.

If you wanted to add a board game element, you could move a piece around a board game (such as chutes and ladders) instead of "keeping" dominos for scoring. for correct answers they can move forward by the numbers added or just by one.  The winner then becomes whoever gets to the finish first.  Be creative with it and have some fun.

Monday, April 30, 2012

Stone Soup and other Children's Literature About Food


This activity is an old classic done by many primary teachers in many states for many years.   It seems the story likely originates in France.  Though there is quite a history behind the story (see link below).  The version I have was copyrighted in 1947 and was written and illustrated by Marcia Brown and given the Caldecott Honor.  The story is titled "Stone Soup", 

In the story, three hungry soldiers enter a village and try to get the villagers to offer up food and lodging. The villagers claim they too, are hungry and don't have any food to spare.  So, the soldiers begin making "Stone Soup".
For the activity you will need:
The Book "Stone Soup" (any of its many variations)
Bread
A Cooking Pot
Water or pre-made broth
1-2 Large potatoes
1 small head of cabbage
3-4 Large carrots
1/2 lb stew beef that has been browned
Some Pearled Barley (a little for your child to touch and feel that is not prepared, and about a cup of ready-to-use barely).
1 cup of milk
3 round, smooth (and CLEAN/sanitized) stones
Salt
Pepper
AND other seasonings as desired to taste.

I used a crockpot and browned the beef before I began the activity with my little one, but this could be done before dinner time on the stovetop instead of in a crock-pot as well.  The story begins with water, salt and pepper.  I recommend beginning with a broth and additional seasonings for a more flavorful meal.

1. Read the story together.  Stress the use of ordinal numbers (first, second, third. . .)  Ask your child to re-tell the story in his/her own way.  Ask the child what the villagers thought about the idea of Stone Soup.  Why were the villagers so impressed?  Were the soldiers really using magic?  How did the soup really come about?

2. If needed, introduce the word, "ingredient".  Skim through the story together asking your child to pick out the "ingredients" you will need and right down your shopping list.  Use ordinal numbers again, "what will we need first?  What comes second, third?  The Fourth ingredient will be? . . ."

3.  Obtain your ingredients.  Whether your child actually goes to the grocery store with you is not important.  You can simply "obtain" the ingredients from your own supplies, but if he/she does go with to the grocery store or farmer's market, go ahead and put your child in charge of checking off the ingredients as you find them.  If one of your children is in second or third grade, he/she could probably even keep track of the prices on a tablet of paper for you and you can have an extended activity incorporating higher-order math by figuring out how much the soup cost to make.

4.  Read the book together again in the kitchen.  Actually make your soup as you go.  Again, stress the ordinal numbers.  "What do we put in first dear?  Second?" and so on.  Obviously, depending on the age and ability of your child you will want to keep safety around knives and hot objects in mind, but give him/her a role.  My little girl read the ingredients to me and cleaned them before I chopped them and put them in the pot.

5.  Serve your soup with a nice crusty roll made from your favorite bread recipe (or your favorite bakery).  Eat your soup (be sure to remove the stones first and have your child see they have been removed).  Ask, "did we really need to put the stones in there?"  Over dinner discuss how the soldiers tricked the villagers with him/her if he/she wasn't old enough to catch this on his/her own.  Then discuss taste, texture etc. using ordinal numbers again, "what are you tasting first? second? what veggies were in your third bite?" etc.

This story has quite a history and a number of variations.  For information about accessing some of these variations simply take a look at this Wikipedia article - who knew Jim Hensen and Shel Silverstein have both referenced this tale?  Perhaps you'd like to further extend the activity by taking a look at multiple variations of the story and compare.  I know I'm looking forward to seeing Jim Hensen's take on the matter.  http://en.wikipedia.org/wiki/Stone_soup


Complimentary idea:
If you have another younger child in the home, you can make a simple bread dough recipe and put your younger child to work kneading the dough while you and big sister/brother start the soup.  Bread will take longer to cook unless you use the crock-pot idea, but the sensory experience of kneading dough is pretty engaging for most young kids.

For more information on why and how spending time in the kitchen can help with math skills, check out "Food Math".

Other books that lend themselves to a food-related activity:
The Gingerbread Man or Hansel and Gretle - make a gingerbread house or people. 
All in Just One Cookie - make some chocolate chip cookies while getting a little geography.
Pie in the Sky (Louis Ehlert)  Includes Pie Recipe
Pancakes, Pancakes, Eric Carle  Make Pancakes
Little Black Sambo, Not perfectly PC, but I did once see a more modern take on this             
                             old story you might be able to find (Pancakes).
Little Red Hen  (bread)
The Ugly Vegetables (another soup)
Enemy Pie,  This one is a GREAT one for a lesson in empathy and getting along with 
                            others.  Also a Reading Rainbow Book. (More Pie)
All for Pie, Pie for All  (Even more pie)

Have you encountered other great books or stories that could be inspiration for an activity centered around food preparation?  Please share them with us!  What recipe would you use along with the book if one isn't included?